Camera Lingo: Basic Photography Terms for Beginners (Plus Slang!)
Get yourself familiar with the basic photography terms today!
Getting into the photography industry can be quite overwhelming. With all the technical stuff you need to learn, it will take dedication and hard work to master the craft in its totality. But heck! It’s gonna be worth all the trouble, trust me.
As beginners, it’s normal to feel lost, especially around pros and experts. Sometimes, you will hear photography technical terms and wonder what they mean about it or where it came from.
Most times, you will encounter difficult camera vocabulary that’s hard to even remember. But, with a little patience and determination, you’ll definitely master the camera lingo!
So today, I’m going to share with you:
- the basic photography terms
- the slangs
- technical terminologies
…and other interesting parts you need to know in order to keep up with the pros!
Let’s get started, shall we?
Photography Terms for Beginners
Every beginner should start with the basic camera terms. The knowledge of the fundamentals will greatly influence your journey into the photography field. Though there might be some terminologies you couldn’t quite appreciate or understand at this point in your career, it helps that you at least get a little bit of an idea about it.
So, here are some of the most common and important photography-related words you need to learn:
Aliasing
This is a distortion in the digital processing of an image. Aliasing is visually noticeable especially if the photo includes sets of detailed patterns like stripes, checkered boxes, circles, or other types of geometric designs. This happens when the pixels are not properly processed by the imaging sensor.
Ambient Light
Simply speaking, this is the lighting source available at the time of the shooting without the aid of external flash and strobes. It could be natural light from the sun or from electrical fixtures like bulbs and fluorescent. This is usually the best kind of lighting you can get for a more organic image.
Aperture
This is one of the most important terms you need to get yourself familiar with. In the simplest words, it is the opening in the lens that has an adjustable size. This is where the light passes through when you press that shutter button.
In human anatomy, this is very comparable to your pupil. Have you noticed that your pupil dilates depending on the amount of light it detects? The only difference is that aperture can be totally controlled, while dilation in your eyes is voluntary.
The bigger the opening is, the more light can come in. This means your photos will generally be brighter. But of course, there are other factors affecting the brightness of your images. You’ll learn the other elements as you read on.
Aspect Ratio
This actually refers to the dimensions of your image. Cameras have a default aspect ratio, mostly 3:2 for both DSLRs and mirrorless gears. But you are always given the option to adjust this according to your needs. Other common size formats would be 4:3 or 16:9 for mobile phones.
Sometimes, when changing one element of the aspect ratio, the other changes as well. This happens when you enabled the AR lock, especially when editing photos on the computer where you can be more flexible in setting the dimensions.
If you only want to increase the picture’s height, make sure to disable the lock so that the width remains the same even after applying the changes.
Autofocus
For beginners, this is a very useful system that will make you less stressed when taking photos. It automatically adjusts the gear’s focus when the shutter button is pressed halfway through. This makes it easier for you to frame your subject without blurring the essential details.
But sometimes, there are AF systems that are not that reliable, so there are still chances you might end up with a blurry photo. So, once you get the hang of using your camera, it will still be best to go manual for maximum freedom and control.
Well, of course, it’s a given that most pro devices have very fast and accurate AF systems, but it still pays to get yourself more attuned to manual settings so that you can shift easily shift the focus whenever and wherever you need it to.
Bracketing
It is a technique used by many expert photographers to show the difference between the same subjects under different camera settings. For instance, you can often see a set of the same images with different brightness levels, and that’s what they call exposure bracketing.
The main purpose of using this technique is to present the same camera settings, which can later be used to create a more visually appealing masterpiece with a high dynamic range.
Bulb Mode
It is a setting in your camera that allows you to control how long you want your shutter to stay open. This enables you to take ultra-long exposure photos which can be very beautiful when done properly.
You can do this by setting the camera to Bulb mode and press the shutter button for as long as you need. It could be a couple of seconds, or minutes, you decide. But just a little reminder though; the longer the lens’ curtain remains open, the more prone to shakes your images will be.
It would be best not to use this mode when doing handheld shots. A tripod paired with a good image stabilizer will lessen the motion blurs during this shooting mode.
Burst Mode
This is another powerful setting that can help you capture fast-paced events without missing a scene. When in burst mode, the camera shoots a series of photos in a fraction of a second. It is also popularly known as continuous shooting mode.
This is perfect for sports photography where your subjects are constantly moving. It is a strategy to freeze action into stills. This will make you witness frames that can easily be missed by the human eye.
Camera Shake
This refers to the sudden movement of the gear while you are taking the shot. As a result, the picture ends up being blurry or distorted. This is the most common problem you will encounter when starting out your journey as a photographer. This is especially true if you always do handheld shots.
But of course, there are always accessories to help you reduce this. For starters, you can invest in a good quality tripod and practice taking photos while using it. You can pair it with is a shutter release remote. Less physical interaction with the gear, fewer camera shakes.
And as mentioned earlier, having an image stabilizer (in-body or a lens with IS) helps a lot.
Candid
This is the term you use for photos taken without the subject’s knowledge. But don’t get me wrong, it’s not like the illegal stuff like stalkers do.
Normally, this is done by photographers hired to cover events or simply someone who wants to take pictures of everyday life in the streets or a certain community.
In this case, there’s really no violation of privacy since subjects usually know that there’s a photographer taking pictures. It’s just that they don’t know when you’d press that shutter button.
The beauty of taking candid images is that you can capture the rawest emotions and the most natural reactions of people. There are no fake smiles, forced poses, and fancy effects.
CCD
In the simplest language, it is an imaging sensor that converts light into photos after processing. This can be compared to traditional cameras using film. But instead of the film rolls, the processing unit is now digitalized, and more efficient.
Chromatic Aberration
This is also known as color fringing. This happens when the lens does not properly capture all the light wavelengths in the frame. Instead of focusing in one direction, the lens focuses on different areas, leading to aberration.
A more common term for the cause of aberration is lens dispersion. This results in having a purplish (sometimes rainbow) hue around the objects in the image. Something very comparable to this is seeing differently colored videos on TV when the LCD is damaged.
Most of the time, when photos experience chromatic aberration, you will need to have your lenses checked for defects. It can be an indicator that your glass is damaged.
CMOS
There are several basic camera terms that are hard to comprehend. When explained technically, CMOS is quite complicated to understand, especially how it works.
Complementary metal-oxide-semiconductor, also known as CMOS, is a type of imaging sensor commonly found in today’s commercial photographic devices.
It is a microchip that converts protons to signals that are then used to process an image digitally. It is widely favored because of its very high sensitivity to light. With this, it enables you to capture more detailed photographs.
Another term for this sensor is “active-pixel”.
Compact
Compacts, or also known as point-and-shoot, is a digital camera without complicated settings. It’s one of the most common gears you purchase as a beginner or as a casual shooter.
The most distinguishing feature it possesses is the fixed lens and small (compact) design, usually fit for one-handed operation. Thought the lenses are capable of zooming in and out, but that’s about it. You don’t have the option to change the glass since it’s fixed on the device itself.
Today’s compacts are really lightweight and thin, making them easier to carry around for trouble and leisure. The upside of this one is that despite having a small body, they usually sport a large 1″ sensor (for high-end P&S).
Composition
When it comes to camera lingo for dummies, the word “composition” ranks among the most important ones you need to really learn about. It’s far from the writing composition you probably know of but is still kinda related in a sense. It’s much more difficult than that, for most beginners.
Instead, this is how the objects in the artwork are positioned relative to each other. It is how you present the scene to your target viewers. In the beginning, it is easy to forget about proper composition.
A common mistake most amateurs make is to disregard this aspect and just shoot whenever the urge comes. But for professionals, this is pretty much half of what makes their works come out really great.
There are no strict guidelines on how you should compose your images. However, there is a common composition technique to ensure that your work is decent enough. It is known as the “rule of thirds”, more of which you can learn as you read on.
Cropped Sensor
Camera sensors have different sizes. Some are big, some are smaller. This one, in particular, is anything that is smaller than the standard 35mm (24x36mm) film size.
There are two most common cropped sensors known today which are the APS-C and the micro four-thirds. These are significantly smaller in size compared to full-frame ones, which greatly affects the focal length.
Some people say it’s better to use FX cameras, but a cropped sensor has its own set of advantages as well. For instance, its size makes it possible to fit into a smaller body. This only means that the device will be lighter and easier to carry around. On top of that, it’s much less expensive compared to full-frame gears.
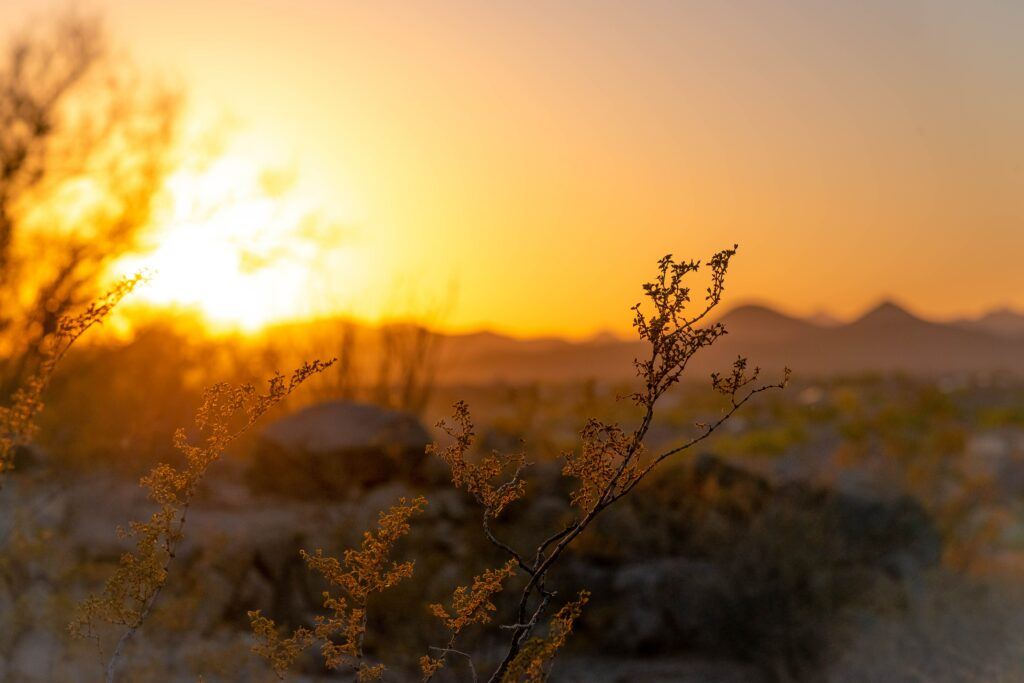
Depth of Field
This is simply how much in focus your photos are in terms of the different objects captured on the frame. DOF defines which parts of the picture are sharp and which are not.
If your foreground is extremely sharp while the background is way out of focus, this is considered a shallow depth of field. An example of this would be having your pet as the subject and only focusing on the eyes or the face, while the rest of the body and the background remain blurry.
In contrast, if the background is almost as sharp as the foreground, then you will have more depth of field. This is especially useful when taking nature and landscape pictures where you want to show almost everything in the scene as sharp as possible.
DSLR
Digital Single Lens Reflex, also known as DSLR, is a photography gear more complex than a point-and-shoot. The main distinguishing feature of this device is having the capacity to interchange lenses based on your specific needs. Unlike compacts, you have more lens options for this camera.
Actually, being able to change lenses gives you more freedom to shoot different subjects and sceneries. You can use lenses specifically for macro work, and use another set of lenses to take photos of wildlife. All this while only investing in a single camera body.
This device works by letting you see what the lens is seeing through an optical viewfinder. The mirror inside the camera reflects the image to the OVF so that you can better compose your photos.
But the downside is that it’s a lot heavier, bulkier, and much more expensive than the tiny P&S. However, this is much recommended for those of you who want to get real serious with photography. If you choose the right gear, it will be one of your most valued investments, trust me.
Dynamic Range
This refers to the correlation between the varying light intensities your camera can capture. It measures the range from the darkest to the brightest light the gear is able to absorb while still producing a visible photograph.
The DR is measured in stops and the maximum and minimum values can vary from one device to another. Some have a great dynamic range, but at a more expensive price tag, while others have average DR at a reasonable cost. You know, there’s always a trade-off between price and functionality for products like this.
Exposure
This is probably the most important basic photography terminology you should never forget. It is one of the fundamental elements that will make or break your artwork.
Simply defined, exposure is the level of brightness of your photo. Though it may sound easy to grasp, setting this thing right can be pretty tricky.
There are three things that affect exposure (also known as the triangle) – ISO, shutter speed, and aperture. As you have probably noticed by now, well-exposed pictures are more visually appealing compared to those that aren’t. You need to find the right balance between the three settings in order to produce a well-lit but not overly bright image.
F-stop
When we talk about F-stops, it is important to remember everything you know about aperture. Why? Simply because F-stops is an indicator of the aperture used for a specific photo.
This is used to determine the degree of lens opening in relation to the focal length of the lenses. Simply put, it is the aperture value you see on your LCD. It often looks like f/2.4, f/8, which can easily be translated as a fraction.
To make things clearer, say for instance you have a 100mm lens and you set the F-stop to f/4, it’s basically telling your camera to open the aperture to as much as 25mm in diameter (100 divided by 4).
Fish Eye
This is a special kind of lens that creates a fishbowl/fisheye effect on your photographs. Instead of a normally flat-looking picture, this one has distorted and mostly rounded edges, making the foreground look larger than usual while the background becomes more withdrawn to the deep ends of the canvass.
This is a perfect lens type if you want to capture panoramic views without much trouble. Plus, there is an added drama to the piece due to the spherical/distorted presentation.
Focal length
Among the many photography terms for dummies, this is probably one of the hardest to explain without demonstration. For most, this is described as the measurement of the gap between the optical lens center and the imaging sensor.
In simple words, it’s something that tells you how much space or scene can be covered by an entire frame. The longer the focal length, the narrower your field of vision will be, but the subject will be more magnified.
If it’s shorter, then it would mean a wider viewpoint and it can take in more scenery/background. Plus, the subject would appear farther in the picture.
Full Frame Sensor
Basically, this is the standard sensor size following the traditional 35mm ( 24 x 36mm) film. Since it doesn’t have a crop factor, it offers a wider field of vision. It lets you capture more space in one frame compared to a cropped sensor.
The catch is that gears with Fx sensors are more expensive and much heavier compared to those sporting a smaller processing chip.
Hard Light
It is a kind of lighting that creates a stark contrast in the image. It casts shadows that are so defined, you can easily spot the contrast between the darkest and brightest areas in the frame.
This is usually achieved by using strobes (normally in studios), or external flash systems so that they cast a string light against the subject. In effect, the output will look more dramatic and aesthetic.
Hyperfocal Distance
Remember when I mentioned the depth of field earlier? Well, this is the term used to describe the farthest distance your lenses will allow you to capture pictures with the max DOF.
When you talk about hyperfocal distance, you are trying to figure out at which focus distance will give you sharper details throughout the entire frame. It’s normally used in landscape and wildlife photography.
Image Stabilisation
This is a mechanism or strategy that reduces or correct unintentional motion blurs caused by sudden camera movements. This usually happens when you accidentally move the gear while pressing the shutter release.
The IS can be in-body (or included in the camera’s system) or it could be a feature within an accessory such as lenses with image stabilizers. And, it greatly helps reduce blurs when doing handheld photoshoots.
ISO
This is one of the three fundamental elements of photography; among the “triangle” of exposure. It is simply the capability of your gear to capture light as it comes into the lenses. It is also defined as the degree of sensitivity to light.
If ISO levels are high, it means your images will be brighter. Together with the increase in exposure, also comes a greater risk of producing grains, or digital noise.
JPEG
This is a common imaging file format compatible with most electronic devices. The acronym stands for Joint Photographic Experts Group in recognition of its founders.
This file type is usually a “reduced-resolution” copy of the original picture. When saved as JPEG, the file size is significantly reduced to much smaller and easily transferrable data.
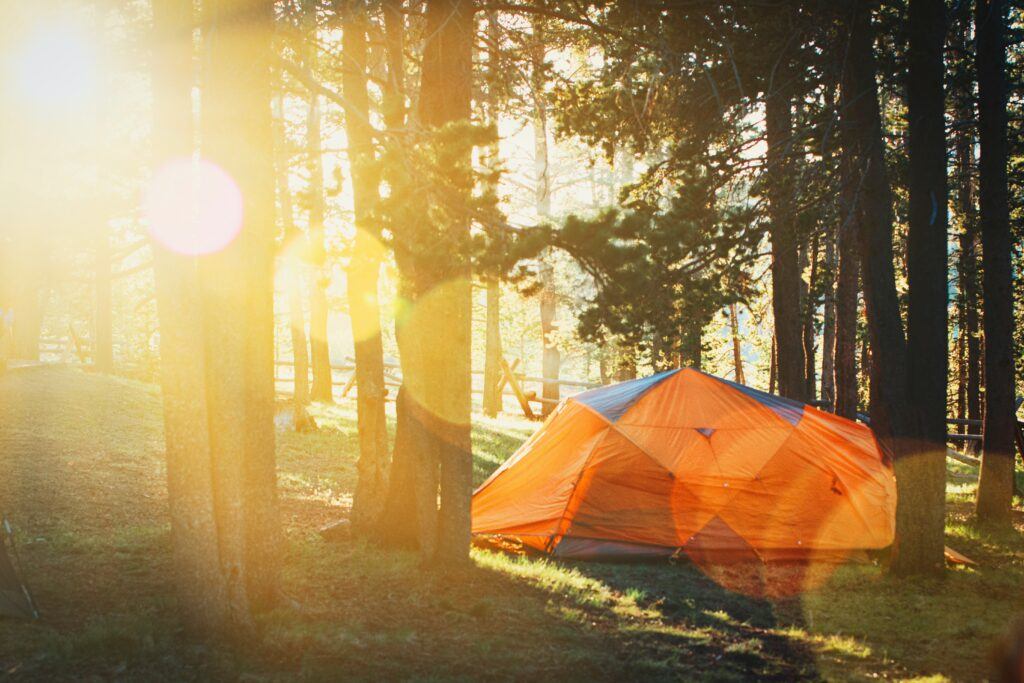
Lens Flare
This is a phenomenon that indicates there might be something wrong with the lenses (if it happens often). When using a well-made glass, the light passes through without distortion. But when the lens is damaged or dirty, it can cause the light rays to scatter, causing the flare.
This is usually characterized by circular halos or something like blots in the photo. Sometimes accidentally, it can actually make an image look good, but most times, it won’t.
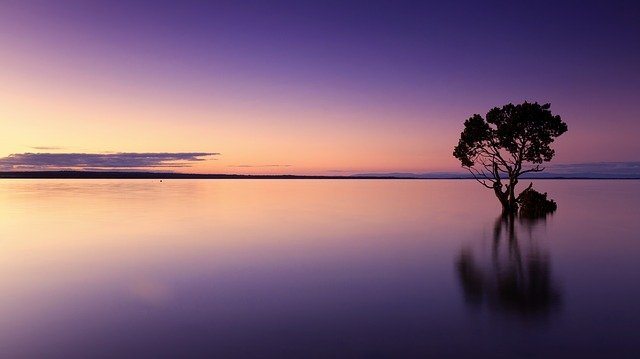
Long Exposure
This is a technique that allows you to portray a sense of motion in still images. This usually creates a beautiful motion blur, making the output more pleasing to the eyes.
You can achieve this by setting your shutter speed slower. You may set it to several seconds or even minutes, depending on the results you wish to get.
The longer the blades remain open, the more light there will be, which makes this very good for night photography. But to counteract unintended motion blurs, it would be best to use a tripod for long exposure shots.
Macro Lens
It is a special kind of lens for a very specific purpose. It is used for close-up work. Have you ever tried using your regular zoom lenses, or even just your smartphone camera, to take photos of objects extremely close? What was the effect? It won’t focus, right?
Macro lenses allow you to be as close to the subject as possible while still maintaining focus. It produces lifesize magnification for the object in the frame. This makes it perfect for product, food, animal, and insect photography.
Mirrorless
It’s a piece of photography equipment that is somewhere between compacts and DSLRs. It is significantly smaller and lighter than pro-grade DSLR, but heavier and bulkier than P&S.
Appearance-wise, it looks more like the most common SLRs you see today and comes with interchangeable lenses. However, they don’t have “mirrors” like their bulkier counterpart.
The light passes through the lenses and directly into the imaging sensor, making it more efficient and less heavy.
Panning
It is a technique used to capture panoramic pictures. You can do this by moving the gear horizontally while pressing the shutter and stopping once you release it. This is what you do if you want to capture a wider scenery that doesn’t fit the regular frame.
Prime Lens
A type of lens with much versatility. It has a fixed focal length, meaning, unadjustable, unlike zoom lenses. It is most commonly used for portraiture and it’s also good for low light conditions. It is also sometimes called a “pancake” lens because of its rather flat appearance.
RAW
A term used to describe an unedited and unprocessed image. It is normally characterized by large file size. It is best for post-processing since it will give you more flexibility in adjusting the elements of the picture rather than working on a lower-resolution JPEG format.
Reflector
A tool (accessory) that is used to reflect light towards the direction you need it to. It can be used both indoors and outdoors. In-depth guide on what is a reflector in photography.
Resolution
This refers to the pixel count detected per inch of a picture. Generally speaking, the higher the pixel count, the better the photo resolution is. Also, a higher resolution means more details in the output.
Rule of Thirds
It is a basic photography guideline, or a rule of thumb per se, used for composition purposes. Experts believe that when you apply this in every shot, your work will appear significantly better and appealing.
For this, the frame is divided into 9 equal grids (three parts, both horizontally and vertically). The objective of this is to position the subject in one of the three parts to make it look more eye-catching.
Pro tip: position the subject in line with the four intersection points in any part of the grid for better results.
Shutter speed
This refers to the amount of time the blades of the shutter remain open. The longer it stays open, the more light will come in. As a result, the images will be brighter. Consequently, if it closes immediately, the resulting output will be darker.
Also, it completes the exposure triangle along with ISO and aperture.
Soft light
The term that is used to describe the mellow transitioning of shadows to highlights. In contrast with hard light, this produces a rather dreamy effect on your pictures.
Speedlight
This is a piece of auxiliary equipment used to provide additional lighting during photoshoots. It is usually an external flash system that can be mounted on top of the camera. This is perfect for low-light conditions.
Telephoto lens
A type of lens with an extremely long focal length. It will make faraway objects look closer than they really are. Also, it produces a shallower depth of field as its magnification increases. This makes it perfect for sports, wildlife, and astrophotography.
Timelapse
Refers to the camera mode that allows you to record long-running videos in a more compressed format. There are usually different timelapse settings, letting you choose the compression rate. The bigger the compression rate, the faster will be the playback speed after recording.
During a timelapse, you will see something like a movie in fast-forward mode.
Viewfinder
This is a small eyepiece on the camera where you can see what the lenses are actually capturing at the moment. It helps you compose your photos the right way.
White balance
This is the process of removing unnatural colors in the image before it is taken. It considers the color temperature of a given area and condition. Its ultimate goal is to get rid of the unrealistic hues and tones to produce a more natural-looking artwork.
Zoom lens
This is a common type of lens with adjustable focal lengths.
29 Popular Photography Slang
Now that we got the “formal” photography lingo for dummies, it’s about time we move on to the more sassy jargon you should discover before meeting up with your senior photographers.
Read on to learn about the most popular slang you should be using today!
Blown out
This happens when the highlights in the pictures become ultra bright. When some areas of the frame become too white (washed out), editing the RAW file would not even correct it.
Blue hour
This is the time of the day when the skies turn a cool shade of blue. This happens moments before sunrise and sunset. However, this depends on where you are located and when you are there.
Not all places witness the same hue every day. But, there are several useful applications that can help you plan your session and capture that amazing dark blue sky.
Bokeh
It is the slang used to describe the beautiful blurry parts of an image. When the lenses focus on a close subject, it produces a shallow DOF. When this happens, the background is naturally blurred out and the circular light reflections are what we call “bokeh”.
However, many artists argue that it’s not the light reflections alone. The term should encompass the entirety of the background blur.
Cam-jam
Used to describe a person who has no formal education on the craft, or someone who doesn’t know anything about photography, but still takes really great shots.
Chimping
This refers to the act of continuously checking or reviewing images on the camera’s screen. If you are covering an important event, this could really be bad since you will definitely miss out on some important moments.
But if you are doing studio shoots or portraiture, it helps when you check the shots from time to time, but never constantly!
Digital lasagna
This is what you call a person who loves to put a lot of layers (Photoshop) without naming them properly. You know how confusing it can be to have several layers without a reference point, so you better not be a digital lasagna!
Dust bunnies
This refers to physical dirt or a speck of dust on your imaging sensor. It often shows in the pictures in the same place. When you see something like this, it’s about time you take your baby for a cleaning service before it gets worse.
Fast glass
A lens that has an extremely wide aperture. It is called “fast” since it allows you to set the shutter speed faster than those with a smaller aperture.
Flash and drag
This refers to the act of utilizing a rather slow shutter speed together with a flash. It makes the resulting image have quite a warmer and mellow tone.
Gobo
Anything that is placed in front of lighting equipment with the purpose of manipulating the shadows it casts. It leaves a really good artistic effect on your shots.
Golden hour
Contrary to the blue hour, this one happens just a little shortly after sunrise or sunset. It is that wonderful moment of the day when the skies turn a bright orangey hue, hence the term “golden”.
Grad
A shortcut for “gradient”. It is a kind of filter that contains light to dark parts.
Grafikking
This act refers to the use of several filters (PS) for a single picture. Sometimes it looks great, but most times, it won’t.
Grip and grin
Just basically a photo of two people shaking hands while grinning at the camera. You usually see this in awarding or turnover ceremonies.
Groufie
The act of taking a photo of a group using a front camera of a smartphone or other photography device.
Kelvin
You are probably familiar with the Kelvin scale, right? In usual practice, we consider it a tool to measure temperature. In this field, it is the term used to describe a device that measures color temperature. This also helps you get the perfect white balance.
Machine gunner
Someone who keeps taking shots of one subject over and over, in the same position, when in fact only 1 picture is needed or is going to be used.
Marching ants
If you’ve ever tried using Photoshop, you are probably familiar with the selection tool. Have you ever noticed the animated dots it creates once you select a certain area? Those are called marching ants.
Nifty fifty
This refers to good quality and fast 50mm lenses that are really affordable and way cheaper.
Photobomb
The act of interrupting a photo just when the shutter button is almost released. It’s usually done to joke around the people who are the only ones originally meant to be in the frame.
Photog
Short term for a photographer.
Pixel peeper
This is what you call someone who constantly zooms in the image up to the point where you can see the pixel quality. Let’s admit it. At one point, we have all tried doing this. HA!
Selfie
This is the act of taking oneself’s photo using the front cam, usually of a mobile phone. Some countries call it “selca”, short for self-camera.
Shoot and burn
When covering events like parties, most photos take time to edit the shots and only give the clients the best ones from the bunch. But when you say shoot and burn, you burn everything in a CD and give it all to them. Meaning, they get all the good, plus the bad pictures.
Shutter nutter
This is what you call someone who has extremely insane and big projects. Someone doing top-notch photoshoots.
Shutter-bug
This is what you call an amateur who takes really great shots despite not knowing anything about the craft. It’s basically like they are “born” with the talent. But of course, this can only take you so far. You will still need a lot of studying in order to thrive in this industry.
SOOC
It is the acronym for “straight-out-of-camera”. It means that the image hasn’t been edited or processed. It also means there’s no filter used. What the gear captured, is what you get.
Spray and pray
The act of taking pictures continuously without checking them. The slang “pray” refers to the act of wishing that there is at least one good outcome from the burst shots. This is usually done when covering fast-paced events like sports or wildlife.
Uncle Bob
Someone in a wedding (usually a relative) who gets in your way to take their own photos using their own gear.
Final Thoughts
Your journey to becoming a pro doesn’t stop with knowing the parts of your gear or how it works; actually, it’s more than that. Learning the right terms will help you have a much easier ride.
Now, I know you will be meeting a lot of people when you go out into the field. With these camera terms explained, you will never get intimidated by someone who started ahead of you. Be confident in knowing that you are equipped with the knowledge of the right photog language, and you’ll end up with some really good friends in the industry.
Now, I want to hear from YOU:
- Did you enjoy the discussion on camera lingo?
- Do you know any other photography slang?
Share your thoughts in the comments section below!
About Author
Kate Janelle
Photography enthusiast and content creator at Digital World Beauty. My main objective here is to create a valuable resource for you with honest tech gear reviews, course recommendations, and how-to tutorials.