Types of Reflectors in Photography: Shapes, Colors, and Uses Explained! (Guide)
No photographer would be able to produce fantastic quality images without proper lighting.
Whether you capture images inside a studio or outdoors, one of the most important (and sadly also an underrated tool) that you need to have is a reflector.
If you are learning to be a photographer, then understanding, choosing, and using a reflector may be a daunting task. And that’s exactly what I want to help you with here.
In this guide, we’ll talk about the following:
- what are reflectors in photography and what does they do?
- what are the different types, and what do different color reflectors mean?
- how to use reflectors?
- best recommended courses to learn about lighting
Without further ado, let’s get started.
What Is a Reflector and What Does It Do?
==> This video is from Natural Light Couples Photography course <==
A reflector is an underrated equipment that you can use to get higher quality photos.
To the question of what reflectors are and what they are for, a photographer who values his time and effort will answer even in his sleep.
Of course, to achieve this or that effect, you can use the almost limitless possibilities of graphic editors, but not everyone has the appropriate skills and a considerable amount of free time. After all photo retouching requires a LOT of time and experience to do effectively.
As the name suggests, a reflector should reflect light. It can be used both indoors and outdoors, in accordance with the task in hand, and will come in handy at any time of the day.
On the surface, it looks like an extremely primitive device, I mean we’re talking about a solid frame to which a tightly stretched fabric is attached.
(There are also more complex modifications of those, which will be described later.)
The reflector works on the principle of collecting light coming from a light source and reflecting it onto a specific object. It is not difficult to guess that a reflector is useless without luminary. Both daylight and directional, artificially created one (camera flash, lamp, etc.) can serve as a source.
Let’s talk about the different types of those.
Types of Reflectors in Photography
Reflectors can be classified according to different parameters. The modern market has a variety to choose from.
When buying your first reflector, it is important to make a list of requirements that it will have to satisfy. For example: the required shape, size, price, color, or manufacturer.
This tool is quite affordable. Most of them come as a five-in-one bundle.
However, there are a few things you must keep in mind before you buy and use the reflectors, and they are the following:
-
Size
Reflectors come in a range of sizes, and the size is probably the first thing you need to consider when buying one for yourself. It’s important to understand what is the purpose of your reflector.
If you mainly shoot portraits or are on a lookout for something more portable, then choosing a small sized reflector makes perfect sense. A collapsible 40-inch one is ideal in such cases.
Among the most popular on the market are models ranging in size from 80 to 100 cm in diameter.
These types of reflectors are almost universal: they give good reflected light and allow you to make harmonious, bright photographs.
Such a light disk is able to show its functionality both when shooting portraits of 1-3 people, bust or full-length, and when photographing fairly large interior items or small rooms.
Larger sized reflectors tend to diffuse light over a broader space; thus, making the light appear even softer.
The downside to that is you will not be able to travel around with it comfortably, especially if you go on hikes and treks. Or if you work solo (without an assistant).
-
Reflector Colors
Choosing the right color of this tool will depend on the type of image you want to produce, as well as the type of photography you would practice or do.
Silver colored reflectors will increase the highlights and in turn yield an image with higher contrast. This is particularly great for videos, black and white photography, and product shoots.
Gold is great as it produces a warm golden glow that looks very natural and is perfect for either indoor portraits or sunsets.
Black is typically used as a flag in order to block any light. It is also used in situations when the photographer wants to reduce the amount of light.
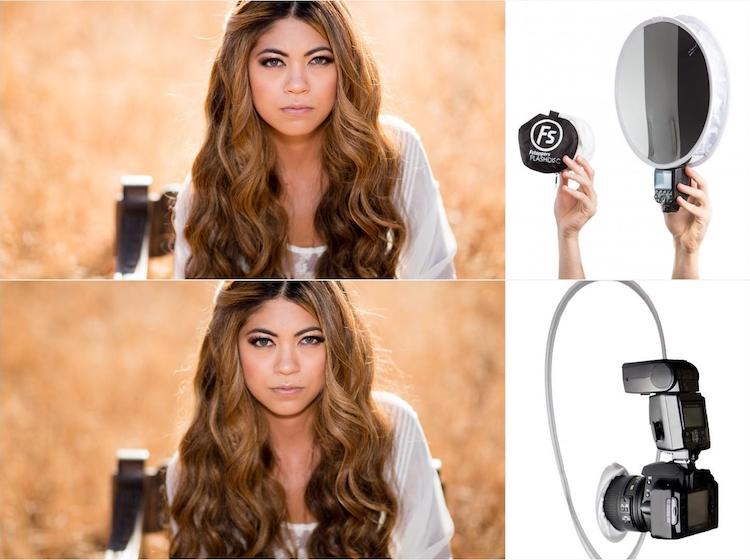
White is generally used if the aim is to produce an even and neutral-colored bounce light that will work perfectly as a source of fill light.
Translucent reflectors are mainly used to diffuse light in order to produce a broad source of light with a soft effect.
Combination generally has 3 in 1, and even 5 in 1. Sunfire and soft silver are generally the most popular ones.
What do different color reflectors mean? White is the most popular as it performs standard functions without greatly changing the external color of the object. Black will add drama to the model, absorbing excess light and adding shadows. A reflector with a gold canvas will help create an atmosphere of warmth and comfort, add a tan to pale skin, and a silver one, on the contrary, will “cool” the photo.
As you can see, each of them is interesting in its own way.
-
Shape
Speaking of elementary folding reflectors, one can single out classic round, triangular, oval, rectangular and even square ones.
There are also more complex designs, often used in studio shooting, which are divided into:
- Spherical – used for portrait shooting;
- Elliptical – used for the accent and nuance, highlighting specific parts;
- Parabolic – often used for shooting in nature;
- Conical (snoot) – this shape is used for intense limitation of the light spot.
Each of them will 100% fulfill its tasks, provided that it is properly installed and used correctly (for example, catching the light and are reflected in a person’s eyes to create the sparkle effect.)
How to Use Reflectors in Photography
As we’ve established already, a reflector is essential as it can help a photographer capture a high quality photo even under bad and average lighting conditions.
Generally, when it is placed below, it will fill in the shadows, and when used from above, it will help in blocking the distracting sunlight or studio light.
It can also allow the light to bounce to create some seriously dark and deeper shadows.
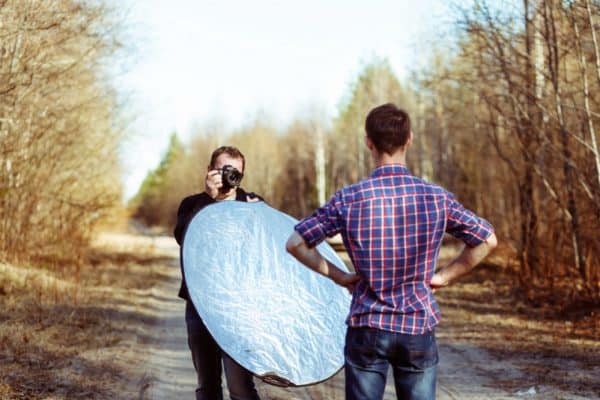
Now, you can either use a reflector by placing it on a stand or asking another person to hold it. You can also ask the subject to hold the reflector, on his or her lap.
(Keep in mind that when you are shooting images in natural light, your subject should not be looking directly into the reflector as it bounces the UV light.)
-
Technique #1: The Different Angles
Using a reflector is fairly simple.
Start off by holding it at particular angles and determine which angle reflects the light the way you would like.
It goes without saying that when placed exactly opposite the light source, you will get the brightest possible light.
On the other hand, if you aim to fix odd shadows, the reflector should be placed right in front of the subject, especially if he or she is sitting or standing in the line of light.
Although amateur photographers tend to use reflectors mostly in upright angles, do not limit yourself since you can also place it at lower angles.
In this way, when you are taking a portrait photo, the appearance of under-eye shadows can be prevented.
What you just need to do is place the reflector flat on the ground right in front of the subject.
Keep in mind that when working with a reflector, it is important to know that the closer it is placed to the object and the larger the disk itself, the more intense and brighter the model will be illuminated.
Accordingly, the farther it is from the object and the smaller its size, the softer, more natural and calmer the reflected light in the photo will look.
Also, don’t neglect the angle of inclination and the aperture of the source itself. This factor plays a key role in the quality of the shooting result.
As a rule, having spent several long photo shoots with the same light disk, you’ll get used to the equipment and can set it up, relying on your intuitive instinct.
-
Technique #2: The Deep Dark Dramatic Shadow
We have all seen vivid images that have dark shadows.
A perfect example of this technique is the famous portrait of Steve Jobs with his hand on his chin.
This is actually easily achievable with the help of reflectors.
Simply use the black colored reflector and place it on the side of the subject. The black reflector will very clearly create this dark and deep shadow on one side of the subject making it look quite dramatic.
This technique is ideal for headshots and adds that element of drama to the images.
It is also a great way to give the subject a photographic facelift and get rid of all those extra pounds by using the shadows to cover them up.
This can also be the perfect choice when you are capturing body shots since the shadows will make the contours of the body appear more defined.
Best Courses to Master Lighting

Alright, so now you are familiar with different types of reflectors in lighting.
But if you would like to learn more about lighting, flash photography, how to use reflectors effectively, then I highly recommend Pye Jirsa with SLR Lounge.
He has decades of experience, is an amazing instructor, and has a very active photography community. He also offers great membership plans that you can take advantage of.
Here are Pye’s courses on lighting and portraits:
- Lighting 101: The Fundamentals of Flash Photography
- Lighting 201: Single Source Off-Camera Light Shaping
- Lighting 3: Advanced Off-Camera Flash
- Lighting 4: Creating Every Natural Light Effect Using Flash
- The Headshot Photography Workshop
- Natural Light Couples Photography
Now…
His tutorials are intended for beginners and professional photographers alike, and he offers an incredible lifetime premium membership plan, so you can learn at your own pace.
Check it out!
Reflector Photography: Final Thoughts
Summing up, we can highlight both positive and negative aspects of using reflectors in photography:
Pros:
- Variety of choice, simplicity and versatility
- High quality output photo
Cons:
- Must of an assistant when shooting outdoors or when using large-sized reflectors
- Extra baggage
Obviously, this tool is pretty useful. Reflectors really simplify the life and work of photography craftsmen. Of course, with the ability to “feel” the light, it may not be needed, but insurance has never harmed anyone!
All in all, they do have the ability to produce highly dramatic and improved images.
While it does take a while getting the hang of it, we are sure that after a certain point you will not get enough of this tool.
Also, once you master it, you might no longer need to always carry a reflector with you since the outside world comes with its own reflectors like a glass building that directly gets hit by the sunlight.
Practice is exceptionally important in becoming a better photographer.
Now, I’d like to hear from YOU:
- What are your thoughts on reflector photography?
- Do you have any thoughts on the uses, colors, and whether they are worth it?
Let us know your thoughts in the comments below!
About Author
Zarina
Founder & content creator at Digital World Beauty. My main objective here is to create a valuable resource for photography enthusiasts with honest tech reviews, course recommendations, and how-to tutorials.