10 Mistakes Photographers Make When Travelling (And How to Avoid Them)
I will keep this intro short:
Today we’ll look at some of the mistakes photographers may make during their trips.
(And how to fix/avoid them.)
Without further ado…
Mistake #1: Damaging Your Equipment During Transport
You might know this one but I’ll still say it:
Don’t give in to temptation to put your gear in the luggage when taking a flight.
(Actually, it’d be a foolish idea.)
Truth is, standard suitcases and bags often don’t withstand strong shocks. This being said, fragile cameras and lenses can be easily damaged.
Instead, use a carry-on.
Just make sure that your camera and other accessories when packed conform to the carry on rules of the airline you’re flying.
If you do decide to put your photo equipment in your check bag, make sure that it is designed for long-distance travel and can withstand heavy blows. (I strongly advise against it though.)
A few exceptions to this rule:
- tripods,
- flash drives,
- battery chargers.
They are usually strong enough to survive a long trip on an airplane, wrapped in your clothes.
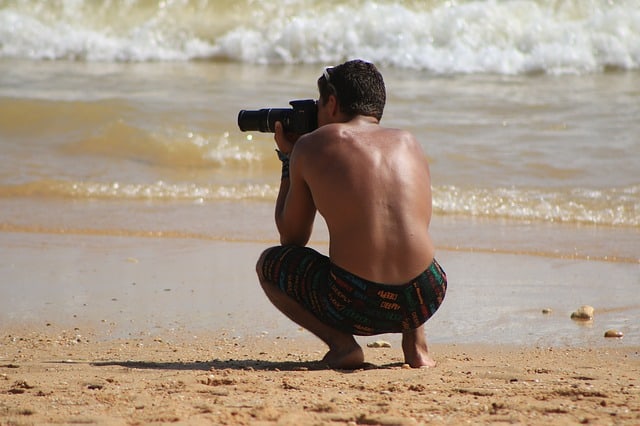
Mistake #2: Damaging Your Gear While at the Beach
Without a doubt:
The beaches provide us with excellent opportunities for photography.
But they are also one of the most difficult conditions for the operation of your equipment. Water and sand might significantly harm your camera and/or lens, if you’re not careful.
When the weather is great (with no strong wind), then you can safely take photos without using protection. But the thing is that you never know what will happen in the next 5 minutes, so it’s best to think ahead.
So…
How to avoid environmental dangers?
- Keep your gear covered as much as possible and clean it well when leaving.
- Use a UV (glass) filter to protect your camera lens.
- Use a single lens if possible so no dust/dirt gets in.
- Do not place your DSLR or even camera bag in the sand.
- If your hands are sandy, another reason to avoid touching your gear.
(Also, ziplock bags are your new best friends.)
Use these tips to protect your gear.
Better safe than sorry.
Mistake #3: Damaging Your Lens When Cleaning
If your camera has been in rather harsh conditions, it’s a good idea to clean it.
Before you remove the lens, do the following:
- Remove the battery and/or memory card.
- Using a dust-removing tool, remove any grains of sand from the camera and lens.
- Clean the gear with a soft cleaning brush.
- Make sure you clean everything thoroughly.
- Only after you are convinced that you have wiped everything, can you use a special cloth or liquid to clean the lens and LCD display.
If you’ll do it differently, you’re likely to scratch it.
Mistake #4: Photographing Main Attractions Only
When I wrote an article on street photography, one of the tips I had there is to capture non-touristy parts of the place you’re going to, too.
Seriously, don’t just take common photos of a “must-see” main attraction.
Look around you and you’ll see excellent scenes that are worth shooting. This way, you’ll capture sincere emotions and the true life of the city anywhere you are.
Also, when taking a picture of the landmark, try to be creative (with filters and angles).
You don’t want to have the same pic as everyone else, do you?
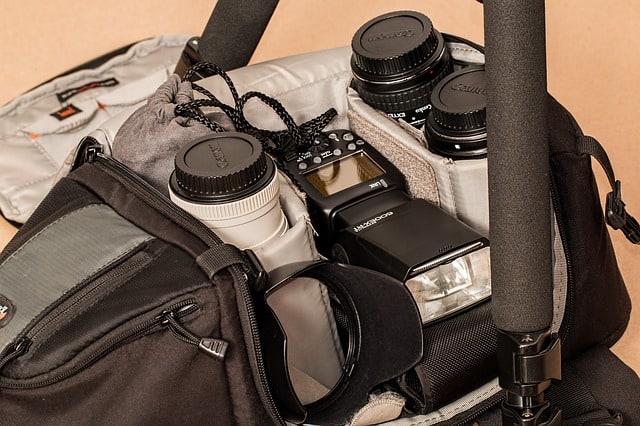
Mistake #5: Bringing Too Much Equipment
( … or forgetting the necessary photography accessories such as battery, chargers, or memory cards.)
Let’s face it:
When travelling you don’t really want to carry heavy backpack with you all the time.
The good news is that there are some really awesome alternatives to bulky DSLRs on the market right now.
(Seriously, check the link out.)
You can get a compact camera with a large sensor (1 inch or bigger), and you have yourself great pics.
Mistake #6: Underexposed/Overexposed Beach Shots
The bright light on the beach can result in overexposed images.
The very same bright light is also disturbing when trying to use the LCD screen, so you can’t really rely on it when evaluating exposure.
What’s the solution?
You need to turn on the histogram view and make sure that the image is sufficiently consistent with the peak of the histogram, shifting the peak of the histogram to the center.
- Relevant article: How to Read and Use Histograms
The flash can also help you to fill in any sharp shadows.
Mistake #7: Blurred Images During Night Photography
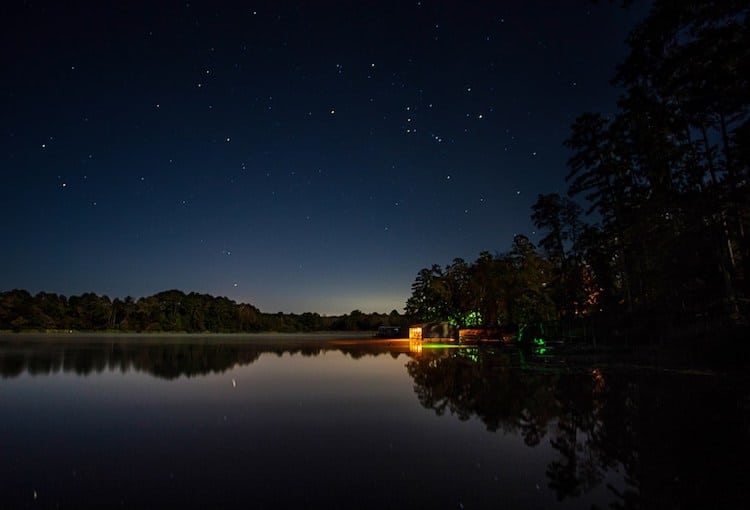
Look:
I have an entire article dedicated to shooting night photos like a pro but in here I want to mention one thing – a tripod.
Your tripod may seem like an unnecessary burden when packing your luggage but if you plan on shooting inside buildings or night landscapes with long exposures, you just have to take it with you.
Today, there are a huge number of tripods designed specifically for travel.
As a rule, they are smaller than ordinary tripods and their weight is correspondingly less. But you must remember that with all this, you should never “save” on the stability of your tripod.
I’m sure you don’t want to come home with a bunch of spoiled photos just because your camera was shaking from every little breeze.
Get a good tripod and enjoy your Instagram-worthy (night) shots.
Mistake #8: Capturing Strangers in Your Travel Photos
While it’s pretty challenging to take shots of interesting places without people in it, it’s certainly doable.
One option is to get up early before everyone and take advantage of that.
If you’re not an early riser, then you can install your camera on your tripod and take a series of shots of the chosen place. As a rule, people rarely stand in one spot for too long, so there’s a chance you capture a photo without them in it.
(The exception is street photography because you document life as you see it.)
Mistake #9: Being Inconsiderate to People, Culture & Laws
Avoid getting into conflicts with the locals, as well as the police.
Some places have certain rules you need to be aware of.
For example, you can’t take photos of people in Spain, it’s a law. Same goes for Islamic countries. (You should especially avoid taking photos of a Middle Eastern women without their permission.)
That’s why you need to do your research before you go somewhere, learn about culture insensitivities and laws regarding photography.
If you really want a shot, having inconspicuous, compact cameras for street photos might help.
Mistake #10: Not Protecting Your Gear in Cold Weather

If you are traveling in places with extreme climate, don’t forget that such conditions can significantly harm your equipment.
Very cold weather conditions, for example, can quickly discharge your battery. Logically, it then will be very difficult to work with to the fullest.
Keep a couple of spare batteries handy and keep them in the warmth, like a jacket or inside a pair of warm winter gloves.
(You can also use hand warmers to keep the batteries warm.)
Another thing to watch out for is the changes in temperature, which can result in condensation.
And that can significantly harm your DSLR.
Dan Carr provides great tips on how to protect your gear in cold weather. Here’s the link.
Like he recommends, the best solution is to carry plastic/ziplock bags.
Travel Photography Mistakes: Your Thoughts?
Now, I’d like to hear from YOU:
- What mistakes have you done as photographer on your trip?
- What are other common mistakes you can share with us?
Any thoughts, questions and/or suggestions are welcome in the comments!
About Author
Zarina
Founder & content creator at Digital World Beauty. My main objective here is to create a valuable resource for photography enthusiasts with honest tech reviews, course recommendations, and how-to tutorials.
Greetings!
My biggest mistake when I took my now aging Nikon D80 with me on its first trip in 2007 was to assume that WB reset itself after turning the camera off. In P mode it didn’t, so I ended up with several extremely cold photos 🙁
Hi Terje,
Honestly, when it comes to photography, there are a lot of nuances involved. That’s why every photographer will talk about gaining experience. Shoot more and more. But hey, you learned from you mistake, right!? 🙂
And 12 years of photography experience… I bet you have a lot to share now!
Thank you for stopping by and hope to see you around!
Hi young lady, and thanks for the reply!
Indeed I have some experience, although I could have studied more but as an enthusiast amateur who only used my cam while travelling, my learning and experimenting curve has been modest..anyway I feel that only a small handful of shots are good.
I later experimented with long exposure night shots (car lights and ‘star effect’ from streetlights), and finally poked around in the HDR world and got a bit hooked on it.
It was only when I was looking for a successor to the aging D80 and being disappointed with trying out the Lumix G80 (G85 on your turf I believe) that I continued to delve more into it and seek to increase my knowledge, as I also wanted higher-than-cellphone quality video for travel video editing, and learned that my demands/wishes are pretty high, so that the next one may be fairly expensive..
Looking at the Z6 now, is it something you would recommend?
Ideally also with a wide angle lens (12-20 or so) but the new Z lens is reaaaaally expensive, wondering if it is an alternative to use the FTZ adapter and a cheaper wide angle like Samyang’s, or if that would be underkill…
I also have a literally wet dream (pardon the expression) to shoot some of the waterfalls in my country with an ND filter to give that ‘dreamy’ look, and that would be new territory for me..as well as shooting in 4K.
Thanks for your attention! 🙂
Hi Terje,
It’s always exciting to hear from my website readers and/or learn from them! 🙂
To answer your question:
I’ll be honest, personally I haven’t reviewed the Z6 yet, so I can’t make a personal recommendation just yet, but I do remember big names in the photography industry praising this Nikon! Based on what I read, Z6 is a solid option.
(Thanks for the question by the way, I’ll add this review to my to-do list!)
Funny you should mention the waterfalls, literally just a couple of days ago I was thinking that it’d be awesome to write an article on some great cameras for waterfall photography!
I’d have to connect with pro photographers on their advice though, as waterfalls genre isn’t my strongest suit. Still that would be an interesting topic to write about.
Regarding your photography:
Have you ever considered taking online courses to improve your skills?
Recently I wrote a review on Nomadic Matt’s photography course: “How to Become a Travel Photographer” that is my #1 recommendation now.
I’ll be updating the review with my personal experience as I go through the entire course but I saw your channel and I feel this is something you might like too.
Especially considering that you’re specifically into travel photography!
Laurence, the instructor, is great and he really covers a LOT of topics in this 8-week course.
(And if you do end up joining the course, I’d love to hear your thoughts on it too!)
Full disclosure:
My review contains affiliate links (means I get a small commission at no cost to you if you follow my links), but it really is a great course that I highly recommend. I myself joined with my own money, so the review is based on my experience and is 100% honest. 🙂
P.S.
Do you plan on growing your YouTube travel channel and making money with it in the future? From what I can see, currently your channel not optimized (for people to organically find your videos on YouTube).
You might want to get into that, YouTube is “traffic on steroids” in 2019!
Hi again miss!
I appreciate you taking the time to write so extensively. When it comes to online courses, I have mostly relied on picking up some tips and scattered information in written online articles or YouTube videos, but I will consider your suggestion 🙂
As for my channel, I don’t consider it to be good or professional enough to have much of a chance to bring me some income, although with better video equipment (I am strongly considering the Z6, which should wipe the floor with our cellphone clips) it may be an option..
Merci merci 🙂
Hi Terje,
A lot of people learn this way, no shame in that 🙂
I personally just prefer more of a “system” in a 1 place than trying to piece it all together from different sources, that’s why you always find me investing in certain courses be it photography-related or anything else haha.
One of the influencers on YT Sean Cannell is awesome, check out his channel. And he always says that it’s important to get started and then along the way you’ll learn and improve.
I personally have background in getting my website(s) found in Google so for me it’s easier to understand YouTube too. But still need to learn the nuances and will get to it in the near future. I think it’s time I start a proper channel related to gear and photography!
If you end up getting Z6, please let me know how you like the camera! When I write a review on it, I could refer back to your comment with your experience/feedback, and my review won’t be very subjective too.
Always good to hear from you Terje, merci pour revenir à mon blog! 🙂
Greetings again, jeune mademoiselle!
It has been a while since I checked for your response, apologies for this.
I can inform you that I have indeed gotten the Z6, and while I did a very challenging test to begin with from my balcony, in midday light (not the best for photography) as well as an evening shot with cold deep blue sky and different temperature street lights, all in the same place, I started to worry again if it wouldn’t hold up. But I decided there must be something wrong with the photographer (I usually say in the computer business that the error is somewhere between the chair and the keyboard), and kept it for a roundtrip in my country, which would be a real field test.
Adding some filters and a stereo mic, I dragged this and a tripod on a walk as well, capturing some waterfalls in long exposure mode with an ND 10-stop filter, and I believe some of them were pretty successful.
I also tried its 4K video capabilities, and playing them back on my computer with a 2.5K screen already looks awesome..and I still can’t see the full quality of it obviously. I also decided to shoot both RAW and JPG on this trip, and take some photos into editing mode after. While I need to learn to play with all the sliders and filters, I believe I made the few I tried look heaps better than the standard JPG.
Something that surprised me a lot however, was taking some photos inside an old historic hotel with timber walls and a lot of atmosphere and old style paraphernalia. While a cozy ‘living room’ was backlit by daylight and additionally had light bulbs, I found it to be a pretty good test, but while using the preset white balances I was not entirely happy until I went into manual temperature setting. Thankfully, the screens show the result before the picture is taken so I was finally satisfied with the real scene vs the viewfinder look. As I view the unedited JPG (yes really) on my computer it looks absolutely amazing.
Bear in mind that I come straight from a Nikon D80 which is quite an aging product, and a side by side comparison easily reveals the amount of details the Z6 captures in comparison. I will also add that having live view is like nirvana and helps a lot, and additionally that the EVF is absolutely stunning.
I think it handles well, is pleasant (and heavy enough at 1.2 kg), fast enough for me if I do a 5 EV bracketing for HDR and generally a dream to use, and touch to focus is also a dream..
I haven’t had a chance yet to try it with much night shots (floodlit architecture, including long exposures of trailing car lights are things that I like to do), so my test is far from complete. One thing I found though was that the live view in some cases (I don’t remember which) doesn’t update to changed settings. I have updated the firmware to 2.0 only after the trip and not tried it much after, just testing it with an old cabled remote control/intervalometer (the latter I will not need as it has one built-in) and after ordering a new cable it still worked.
I have also not tried it out on any models (I don’t have any at hand unfortunately 🙂 )
However, some of the photos I have made/edited I would like to share with you if you are interested.
Vous êtes Canadien? 🙂
Hi Terje,
Good to see you here again!!
To answer your last question, I do understand French and live in Canada but I’m not French-Canadian 🙂 I just have a passion for languages, and who knows maybe one day I will create a blog in that niche too!
And WOW. What a comment.
This is amazing, thanks so much for your feedback! (I will email you in a bit with a proposition.)
P.S. I know I shared a link to Nomadic Matt’s course above, but if you enjoy night photography, Jim Hamel’s course is a must!!! (He’s AWESOME as a person, photographer and an instructor).
I myself bought his course but haven’t had a chance to create a separate review on it yet.