How To Develop Film At Home: Easy Steps for Beginners! (The Complete Guide)
Appreciate analog with this easy guide on how to develop film at home!
Taking photos these days is really convenient. With the existence of digital gears, shooting, sharing, and printing your shots is as easy as 1-2-3! It’s probably one of the many reasons why more are getting into photography now.
But despite these advancements, there’s an increased recurrence of film cameras every now and then. Many artists are genuinely getting interested in taking that bold leap of faith to try out traditional gears. Well, there are so many good reasons for this, I believe.
As beautiful and simple as they are, film cameras have a few drawbacks and among them is the developing process. Before, you’d need to bring the roll to a processing center to have the images developed. However, the good news is that you can now develop your 35mm film at home, on your own!
In this beginner’s guide, I will:
- Share with you what is really a film camera
- What are the necessary things you need to prepare
- The step-by-step film development process
…and so much more interesting stuff.
If you’re feeling excited, read on below!
What Is A Film Camera?
If you are new to the photography industry, or if you’ve only ever known DSLRs, mirrorless, and modern-day compacts, it’s understandable to get confused about what really is a film camera. In the simplest terms, it’s an analog device used to take photos.
It works by using a light-sensitive chemical-based film roll to capture images. You need to manually wind up the knob in order to take a new picture. Once the entire roll is consumed, you either take them to a processing center, or you can develop them on your own, at home.
Though professional developing stores offer so much convenience, you get a different sense of achievement when you learn how to do it by yourself at home. Plus, it might cost you less time and money than getting it done in a photo center.
However, you should prepare some important things and do some research on the correct process so you won’t end up wasting your time and resources.
The good news is, this post will cover everything from start to finish!
9 Things You’ll Need for Film Development
Before you start, make sure you know what to prepare and where to get all these materials. Getting everything ready ahead of time makes the job easier, and reduces the workload by half.
Here is a list of all the necessary items you will be needing for the entire project that you can grab on Amazon at an affordable price:

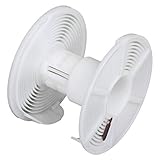
This is the main item for your DIY film development process. It will act as the “darkroom” for your work to cure in. It is a tightly sealed tank wherein light couldn’t penetrate. Its efficacy in blocking the light will determine the success of your process. Make sure you choose a product that does the job.
These go into the developing tank together with your film spool after removing them from the canister. Since most tanks allow multiple reels in one batch, the process becomes more efficient.
-
Developing Solution (B&W Developer)
There are several chemistries used for processing film, depending on the output you wish to have. There’s a black and white, a color negative, and a color reversal type. For this post, we will specifically tackle B&W development since it’s the least complicated among the three, perfect for beginners.
If you don’t have a dark room, this item can suffice when transferring your film from its canister/spool to the developing tank. If you want a perfect result, never expose it to light before it gets processed.
So, even the transfer from one container to the other needs a completely dark environment, and a changing bag can do that job just right.
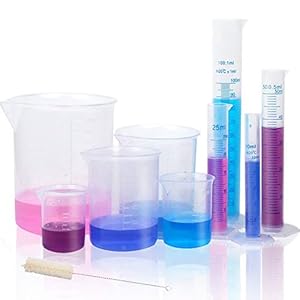
You will need this for properly measuring the amount of solution/chemicals that should go into the process. Using too little or too much might end up ruining your film. Don’t risk it!
This is more effective than using a regular clothespin. You can use this when drying your processed photos.
There’s no required type of thermometer for this activity. You may use either an analog or a digital one. However, using the latter will be more efficient and convenient. At one glance, you’ll see the temperature directly in plain numbers.
It’s crucial to have a timer or stopwatch when you develop a film at home. Setting the time right will help you get the best results.
These are optional items, but quite handy. Sometimes, you might not consume the entire solution, so keeping a container available is a smart move. You can keep the chemicals there and use them next time you want to process another set of films.
Important Reminders Before Getting Started
Trying out the film development process can be quite overwhelming. In order to ensure your project will be successful, you need to keep in mind these important reminders:
-
Get your project station ready
In the planning stage, you should already have thought of a certain place in the house where you can safely execute the process. Since you will be dealing with chemicals, make sure your station is somewhere children or pets couldn’t reach. This will help you focus on the work and ensure their safety as well.
If there’s a spare room in the house or a basement at least, these are great places to use for the development activity. At least this way, you will have an uninterrupted moment to complete the project.
-
Get only genuine chemicals for the solution
This one right here is crucial. You should only use trusted products when it comes to chemistry. Though developing solutions are not considered hazardous, picking the wrong item could lead to disaster.
As much as you can, research the product you want to use. You might also want to check the composition of the chemicals and make sure you don’t have known allergies to one of the compounds used. Better safe than sorry!
-
Clean up
Cleaning up is as important as the prepping stage. Once you are done, especially with the chemicals, make sure you throw away whatever waste is left. If there are unused portions of the solution, you can use your containers to store them until the next project.
Also, don’t lose your film clips. Keep it in a place where you can easily find them once needed. It’s not practical to buy these small items every time you do the process.
Developing Film at Home: The Process
Most people think you can’t develop films at home if you don’t have a dark room. Well, that was a thing of the past. Today, you can definitely process them in any normal room as you wish.
Continue reading to learn the step-by-step process on how to develop 35mm film at home!
-
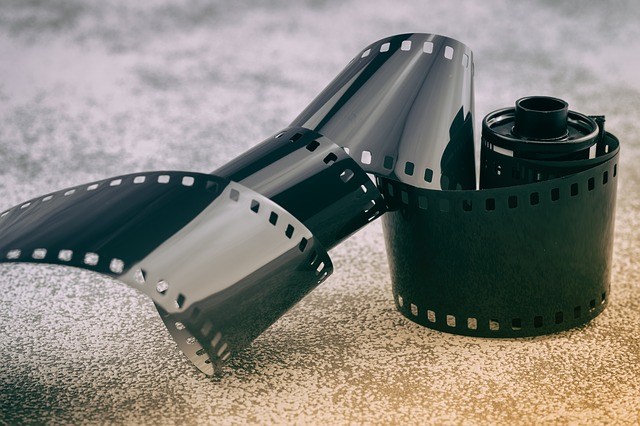
Loading the film
First things first.
The moment you take out the film roll from its canister in a well-lit room, you are exposing them the wrong way and this could potentially destroy the image quality. If you don’t know how to load up the film into the reels, I suggest practicing on a used negative or an expired roll.
READ ALSO: Do Disposable Cameras Expire?
Why am I suggesting this? Well, it’s because you need to do it next time with the lights off, or inside a changing bag. Yes, you read that right!
You need to familiarize yourself with how to properly load the film into the reels without actually seeing it (in the dark). This is the best way to ensure it doesn’t get exposed to light before the developing process.
Now, once you get the hang of it, you can already take out the actual roll for developing. The first thing you need to do is to take out the undeveloped film from its original container and transfer it to the reels.
Cut the topmost portion of the roll (it has a leader strip attached). Make sure you properly insert the remaining strip onto the reels to keep it secured and intact during the entire process. Count up to how many times you need to twist in order to fully transfer the entire roll to your plastic reel.
-
Inserting the reel to the developing tank
The next step is pretty easy. You just need properly put the reels inside the tank. Usually, it can accommodate several spools in one setting. If you are planning to only develop one set of film, you will still need to put the empty rolls into the tank to secure the one containing the fresh film.
Make sure your spool with the unprocessed film is at the center of the tank. Properly align the lid and the agitator so that you can easily twist it once the solution comes in.
-
Mixing the chemistry
There are basically two types of chemicals you can use for this project: powder-based or liquified. The most common ones you see today are in powder form, though.
There are even other specialized chemistries such as solvent and non-solvent. These are rather concentrated forms of developing solutions. But, whatever you choose, it would still be fine. Just make sure you choose whichever you think is the best for you.
For the sake of discussion, we’ll assume you are using powder-based chemistry. By the way, it’s a popular type since it can be stored quite longer than liquid ones. If you can’t consume the entire pack, you can always leave some in powder form and not mix it with any liquid. This way, you can save resources as well.
So, going back. You need to mix it with the right amount of water/liquid, according to the instructions on the packet. When doing this, take extra precautions by wearing rubber gloves so that you don’t end up with burns. It could also have a strong smell, so if your nose is a little sensitive, wearing a mask could help.
Use your beakers/graduated cylinders to measure the exact amount of powder and liquid combination according to the instructions. Mix it well until everything is evenly diluted in water.
Aside from a developer, you might also want to prepare a fixer and a stop bath. The fixer is another chemical that tones the resulting images after the development stage.
On the other hand, a stop bath is a solution that allows you to cut the developing process. You may do this in case you don’t want the photos to turn darker than expected.
-
Development process
Before the actual development, you may pre-wash the film. You can do this by adding tap water (lukewarm, preferably) through the hole at the center of the tank. This process will ensure that there are no visible air bubbles in the pictures once they’re fully developed.
Now, this is the part where it gets really tricky. Before you pour in the actual developer, you need to check its temperature first. In fact, it has to be at 60F/20C for it to work well within the 9-minute developing time. What you need to do is put the solution in the cylinders/beakers and put your thermometer inside as well.
If in case your formula is colder than the required temp, heat it up a little bit. But, don’t expose the beakers to fire directly. You can soak the glass in warm water instead. This way, it doesn’t damage the chemicals inside.
If the temp’s right, you are now ready to pour the chemistry into the developing tank through the agitator. Do this slowly to ensure that all the liquid goes into the hole. Once you begin pouring the solution, be sure to start the timer and set it to 9 minutes.
Note: Later, when you get the hang of it, you’ll know how to adjust timing and temperature to get your desired photo results.
After pouring the entire solution, you’ll have to shake up the tank from time to time. It’s best to do it for ten seconds every minute of the developing process. This way, you can be sure that the entire roll inside is receiving the solution equally.
Additionally, it is recommended to tap the tank after every shake so that air bubbles wouldn’t form inside as it could ruin the quality of your images.
-
Using stop bath and fixer
These are optional steps but could be really helpful as well. A stop bath helps stop the entire process, washing away the remaining solution on the film. On the other hand, a fixer is an enhancer that makes the photo quality better.
To stop the development, you simply pour out the solution from the tank and replace it with your stop bath formula. As usual, shake it to ensure the bath covers the entire roll inside. A 10-second shake will do. You can leave it on for about 30 seconds and then pour it out again after the recommended time.
Now, you’re ready to apply the fixer solution. You will need to do the same routine of pouring the solution, shaking, then tapping for this. However, you need to do this for around 4-5 minutes. This will ensure that your film will get the same amount of chemicals to fix any inconsistencies in the negatives.
After 5 minutes, you can now drain the fixer and replace it with water.
-
Freshwater wash
After pouring fresh water into the tank, make sure to shake it rigorously for about 1-2 minutes. You may have to repeat this process a couple of times until the water turns clear. You don’t have to worry about ruining your negatives. At this point, they are already completely processed and developed.
After doing that, take the cap off the tank and pour clean water inside to fully cleanse the roll.
-
Drying
Take the film out of the reels. If you have a squeegee or something that can wipe off the remaining water from the roll, use this and make sure the negatives are dried properly.
The next step is to hang the processed film using the clips. Make sure you hang them properly and don’t let them curl. You can put a center clip, aside from putting one on each end, to ensure the strip stays as straight as possible. It is recommended to leave it to dry for at least 12 hours.
Once it’s completely dry, you can now transfer it to plastic sleeves to prepare them for scanning.
There you have it! You have just developed your own film at home!
You can now take the negatives to a processing lab for scanning and printing. But if you want to do it by yourself as well, then that part can be quite a bit tricky, and it will require you to have a darkroom or a regular room that’s tightly sealed against the light (drawn curtains, closed doors, no vents, and exhausts).
Is It Worth Developing Film at Home?
Many of you might actually have this question in mind: Is it worth developing film at home? Shouldn’t I just skip the hassle and take my roll to a professional processing center and wait for the printouts?
Well, there’s no right or wrong answer for this. It’s more of a personal preference. However, there are some reasons why it is good to experience it at least once in your entire career as a photographer.
-
Understanding the process
The best thing you can get from this experience is that you get to fully understand how the entire process works and the importance of accuracy in performing this task. One wrong move, and you’ll risk your precious shots in a blink!
Through this, you will understand more how a simple film strip transforms into a beautiful image. It can make you realize that everybody gets a chance at doing this at home without professional intervention.
-
Appreciating the beauty of analog
Analog devices are very intricate. A lot of attention and detail was dedicated to creating them. By doing the development process on your own, you are given the chance to appreciate how wonderful the transformation process is.
You also get the chance to scrutinize every part of your film so that the next time you shoot analog, you will have a better idea of what happens inside once you press that shutter.
You achieve a different kind of fulfillment knowing that you processed your own shots from scratch. And, there’s a high chance you’re never going to processing centers again once you get the hang of it.
-
Cheaper
With so much accessibility to the necessary materials, doing this at home will be a whole lot cheaper. But that’s only if you plan to keep doing it with all your film camera projects.
If it’s for one-time use, then you’d better save yourself from the hassle and take it directly to a processing center. Why?
Simply because some of the materials are non-consumable like the clips, tank, reels, and a lot more. These are more like investments meant for multiple uses. Now, if you only use them once, wouldn’t that be a total waste of resources?
-
Faster
Let’s admit it. We all have those spur-of-the-moment ideas. Like, one moment you’re just relaxing in your room, then the next moment you saw a beautiful butterfly on the window sill. As the artist that you are, you will naturally want to capture beautiful subjects in a frame.
If you use a film camera to take the shot, it will take longer for you to see the results if you take them to a processing center like Walmart, Walgreens & CVS. Usually, it takes about 7-10 business days to get the printouts from them (from developing to printing).
Now, imagine if you take a shot now, do the developing a few minutes after, then scan and print the negatives shortly, wouldn’t that save you so much waiting time?
Final Thoughts
To some, developing film at home is a tedious task. Others even believe that analog cameras should be completely phased out from the market. But, many still believe in its unique output.
Using a film camera adds a natural vintage feels to your images even without filters and post-processing. Through it, you’ll learn the discipline of properly composing a shot since each frame is precious and there are no resets and rewinds in an analog device.
So, if you are one of those who still love film cameras, then it’s about time you do this DIY project for yourself.
Now, I’d like to hear from YOU:
- Have you ever tried developing films at home?
- What other developers have you tried?
- How long was your developing process?
Share your experiences in the comments section below!
About Author
Kate Janelle
Photography enthusiast and content creator at Digital World Beauty. My main objective here is to create a valuable resource for you with honest tech gear reviews, course recommendations, and how-to tutorials.