What is Rembrandt Lighting in Film and Photography, and How to Achieve It?
What is Rembrandt lighting and how is it used in photography? (Guide)
Most people are familiar with the famous 17th Century painter, draughtsman, and printmaker, Rembrandt. Born in the Netherlands in 1609, Rembrandt Harmenszoon van Rijn grew to be one of the most prolific, creative artists of all time.
His work entailed extreme details, most often picturing religious or metaphorical themes, and he was a leading contender in the Baroque Era. Through the extreme use of light and dark areas, the maestro produced dramatic, mysterious pieces.
His success as an artist was short-lived during his lifetime, as after losing popularity among his benefactors, he was forced to file for bankruptcy at age 50. The irony is that today, his paintings are featured in museums and are considered priceless.
Rembrandt Lighting in Photography & Film
Shadow and light is the essence of photography and film.
In fact, the Greek meaning of photography is ‘drawing with light.’ Every photographer’s goal is to use the two elements to produce a compelling, passionate audience response. Combined with the model’s expression and depth, the result should stir up the heart of even the least unfeeling.
This response is the objective of the Rembrandt lighting technique.
Rembrandt’s portraits’ prominent commonality is the signature triangle of light just below one eye. Most portraits lighted with a Rembrandt style allow for illumination of only one side of the face while some detail is noticeable in the shadowed side.
In 1915, this method was copied by film director Cecil B. DeMille in his movie, The Warrens of Virginia. DeMille used borrowed spotlights to create light and shadows and named it the Rembrandt lighting set up.
Since that time, the unique approach has grown in popularity, virtually changing the film and photography industry.
Fast forward to the present, and you will see the use of a technique modeled after Rembrandt’s classic lighting, sometimes called chiaroscuro. The word chiaroscuro comes from the Italian term ‘chiaro’ or light and ‘oscuro,’ which means dark.
Chiaroscuro is often used in horror or mystery films to set a suspenseful stage. More recent examples in movies include Francis Coppola’s, The Godfather,and Martin Campbell’s, Casino Royale.
Setting Up For Rembrandt Lighting Photography
The Rembrandt use of light can be an elaborate or simple project.
It really depends on what you are trying to achieve. The main object is not the type of lights but how the lights are centered on the model.
Key lighting should highlight one side of the subject’s face only. To execute this project, use a Speedlight or studio modeling light with an optional reflector or v-flat.
If you are a DIYer, you can cover a piece of cardboard with foil to use as the reflector.
Positioning the Lighting
Getting together the equipment is the hardest part if you don’t own it already. If this is a trial run, you could borrow or rent the lighting to see how it goes.
Once you have the supplies, you will need to position the key lighting first.
- Place the studio light where it is at a 45+ degree angle in relation to the subject.
- Use the adjusting pole to bring the light above the model and angled downward.
- Alter the height, angle, and orientation of the key light until you see the triangle appear underneath the eye of your subject on the opposite side of where your light is located.
- The triangle shouldn’t be larger than the model’s eye, and it shouldn’t interfere with the nose’s shadow. Additionally, the triangle should end at the bottom of the nose.
- If a reflector or v-flat is used, position it so that it is at the same height as the lighting and on the opposite side of your subject. These tools will help to create a more flattering image as it fills shadows for a softer look.
- The easiest setup for a Rembrandt use of light is a Speedlight.
How to use a Speedlight to achieve correct Rembrandt lighting?
You attach this device to the hot shoe of your camera. It has a rotating flash head that can be directed at your model. Without any modifier such as a reflector, v-flat, or additional lighting, a Speedlight does create a more hard light.
Most women will want you to use a tool to soften the light and shadows, while men may not care. The use of the on-camera flash (many high-end cameras don’t even come with this) is never recommended as it flashes only forward and makes for red eyes.
Adding a third light in the background, directed at the floor, helps separate the background from your subject.
Camera and Model Positioning
The photographer and the camera location are also important in the Rembrandt lighting setup.
When ready to shoot, the photographer should be between the reflector and the light source. The subject faces the light slightly but is directly in front of the camera.
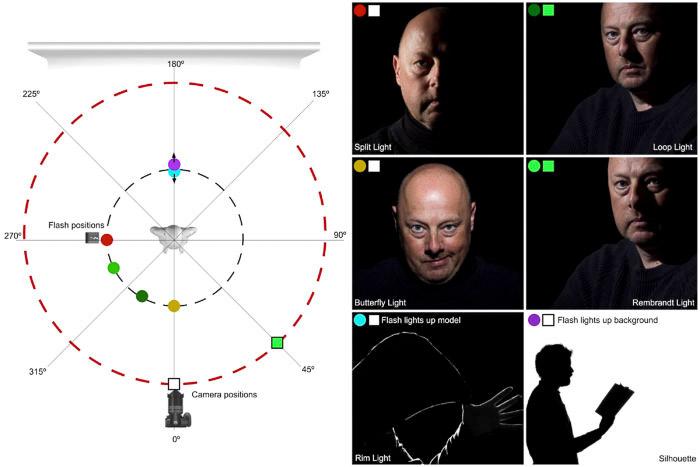
While the camera positioning does not affect the lighting, it will influence the mood. There are two typical types of lighting patterns that build character and interest in Rembrandt lighting photography:
- Broad light means that the broad side of the face (the side closest to the camera) is lit by the key lighting. This puts the shadow on the side that is furthest from the camera.
- Short light is the opposite as the side of the face lit by the key light is farthest from the camera.
Work with your subject on various facial expressions. The Rembrandt lighting technique is only as effective as its model’s emotions. The desired outcome results in a soul-stirring, poignant image.
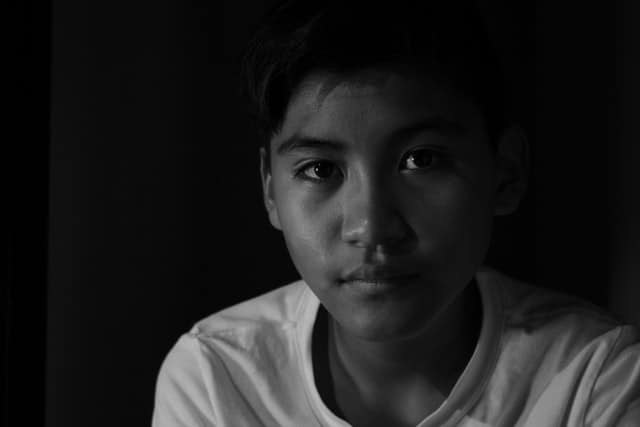
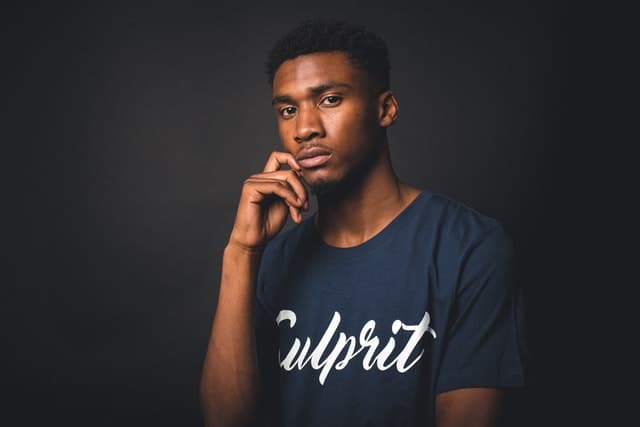
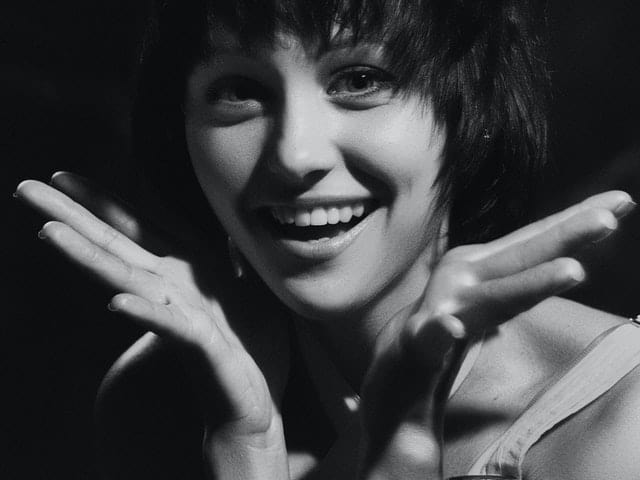
Rembrandt Lighting Photography Examples
Below are the examples where photographers attempted taking portrait photos with Rembrandt lighting:

Do You Need A Studio?
The nice thing about Rembrandt portraiture is that it is a simple light setup.
You don’t need a studio, and the effect can be carried outdoors as well. A dark area provides the best environment, so nighttime or a completely dark room works well. Rembrandt style portraiture most often uses a black or dark background.
Some professional, talented photographers have engineered the Rembrandt look by using window light only. The finished product is softer and more favorable, but natural light lovers beware; it may not be easy to accomplish. Window lighting must be diffused.
Accomplishing this can be done using a South facing window on a cloudy day, early or late in the day. If the day you choose is too bright, try a North facing window or place a white sheet in front of the window to simulate an overcast day. If you find there is too much light, use a black flocked material to cover part of the window.
Pick a larger room for window lighting so that the light in the background won’t be strong.
Position your subject as close to the window as possible and seated so that the light is falling towards them. In this case, don’t use a reflector or v-flat. Using window lighting is tricky but it is a great way to procure the Rembrandt lighting technique if you don’t have a light set up readily available.
Regardless of the way you work your set up, Rembrandt is a challenging lighting strategy.
It takes practice, trial, and error to perfect your lighting and technique. With a willing subject and a lot of patience, you will generate a breathtaking, emotional image.
Frequently Asked Questions
Q: What is the best lighting for outdoor photography?
If you are fortunate, your outside photos will be done on a cloudy, overcast day. Direct sunlight causes contrasting shadows and detracts from the subject. Also, shooting just before sunset or after sunrise will lend a softer look to images.
Q: What is side lighting in photography?
Side lighting is light that is aimed at the model at around 90 degrees from the camera. This type of lighting will achieve one-sided lighting of the subject.
Q: What is butterfly lighting in photography?
Also called Paramount lighting due to its use in Hollywood glamour photography, butterfly lighting consists of a key light that is centered on the model’s face and above her/him. This results in a butterfly shape under the nose.
Q: What is hard lighting in photography?
If you are looking for harsh, defined shadows, hard lighting is the way to go. Your camera flash will create this type of lighting.
Q: Why is 3 point lighting important?
When shooting a more traditional image or film, 3 point lighting is often used. 3 point lighting means that there are three types of lighting and each is positioned at a different angle. This style of lighting helps to make the overall quality of the film or photo better.
About Author
Zarina
Founder & content creator at Digital World Beauty. My main objective here is to create a valuable resource for photography enthusiasts with honest tech reviews, course recommendations, and how-to tutorials.