6 Pro Tips on How to Avoid Shadows in Indoor Photography (A Rookie’s Guide)
Truth is:
Indoor photography is probably one of the most challenging things to learn in the world of photography.
Artificial and natural lights blending with the light reflected and refracted through windows and off of walls can result in unappealing photographs.
Shadow, on the other hand, is your worst nightmare.
These 6 effective tips will guide you on how to avoid shadows in indoor photography.
Want better photos?
SLR Lounge will help you master the techniques you need to take stunning photos. Click here to check it out now.
Avoiding Shadows in Indoor Photography: 6 Tips
Pro Tip 1: Set Your Camera to Manual Mode
First things first:
Put your camera to shutter priority mode—S for Nikon camera and Tv for Canon.
Set the shutter speed at no slower than 1/60 to 1/200 because this range prevents taking artificial light interference and can capture sharp images with no motion blur.
On the contrary, shutter speed higher than 1/200 can capture interference from artificial light sources such as fluorescent lights, lampshades, and the likes. The light bulbs flint at a high rate that is not visible to the naked eye.
These flints are captured as blue and orange bars at high shutter speed.
With the manual mode, you can also control the depth of field (DOF).
For indoor photography, reducing the depth of field is recommended because it helps reduce background noise. You can find more manual settings to help you capture sharp images in different settings and lighting conditions.
Pro Tip 2: Use a Reflector
A reflector is probably one of the most useful pieces of photography equipment.
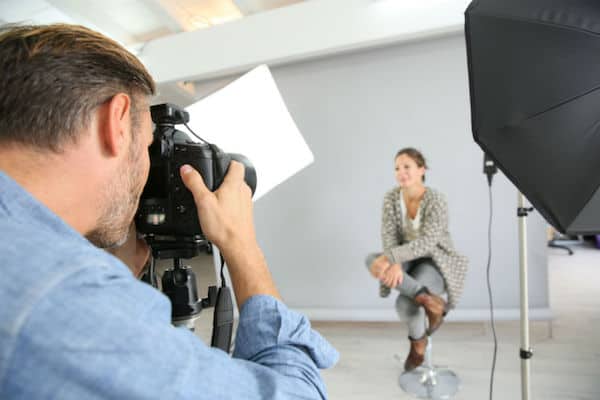
It provides great compensation for lighting for indoor and outdoor photography, day or night. The blank, white paper makes the image look professional by providing a soft fill for shadows that fall onto the subject.
It is also probably the cheapest photography tool that you can buy. In fact, you can actually make one in two steps. How to create a reflector? Easy!
Step 1: Get one piece of white paper or poster board. If you need a larger area to get covered, then get a bigger piece. If you need a stronger reflector, cover the board with a foil.
Step 2: Ask someone to reflect it on the subject.
Now you have your own reflector.
You can use a photography reflector in any way you want depending on your photo needs.
Pro Tip 3: Shoot with a Tripod
A tripod is very helpful in any situation.
Here are some examples when you’ll need one:
- when using a telephoto lens,
- when capturing moments in the winter,
- when photographing landscapes and nature,
- when shooting sunsets and doing night photography,
- when you are taking action shots/sports photography,
… Just to name a few.
It basically allows the designated photography to join in the photo.
Now:
For indoor photography, a tripod allows stability that helps prevent motion blur in any shutter speed or longer exposure.
In low-light indoor photography, you can capture fixed subjects using a long exposure set-up to enhance the light sources and compensate shadow-light proportion.
Learning photography has never been easier…
SLR Lounge is the go-to source to help you become a better photographer. Check out everything you get from being a Premium member.
Pro Tip 4: Take Advantage of the Daylight
Daylight that is cast upon the window gives the subject a nice and soft lighting.
It causes shadows to make the image appear with a shallow depth of field and good white balance. This natural light is more powerful than a camera flash. In fact, it is even considerably brighter.
However, if you don’t want to utilize sunlight as your light source, you can create an artistic shot by casting it to a silhouette effect on the subject.
Pro Tip 5: Understand Your Camera
Every camera is different.
They vary in brands, features, and limitations. It is important that you know your camera’s capabilities and limitations such as the highest ISO settings and its noise tolerance level.
Know when it begins in order to take grainy shots and the other elements that can tweak the exposure and other limitations.
Consider SLR Lounge workshops to understand your camera better.
Pro Tip 6: Avoid the Shadowed Wall Effect
When taking a portrait shot indoors, the most common problem is the shadow of the subject being cast onto the wall. This shadow is distracting because it instantly takes the focus away from the subject.
This is called the shadowed wall effect.
The main reason that causes this shadow is the fact that the subject is too close to the wall where the light is angled in.
So…
The first thing to do is move the subject away from the wall. Add in a reflector or other light source in the background.
Then, alter the lighting position to put the shadows down and reduce the shadow that casts onto the wall.
Indoor Photography: Common Pitfalls to Avoid Shadows
The following is a list of the common mistakes that photographers commit when capturing images indoors.
Knowing these pitfalls also teaches you how to avoid shadows in indoor photography.
- Using the Camera Flash
Using a camera flash for capturing subjects indoors will certainly result in a washed out, unappealing photograph. Even when the set-up requires you to increase the ISO, never use the camera flash.
- Insufficient Custom White Balance
It is important to learn how to set the white balance of the camera manually. In most indoor set-ups, there are different mixes of lighting situations.
For this reason, the auto mode of your camera will not give you the best quality shot.
Learn to adjust the white balance to compensate for the mixed lighting condition for your subject indoor.
- Not Paying Attention to Small Details
There are various lines that make up the scene in indoor photography. Not paying attention to the architectural details of your setting will result in a cluttered, shadowed image and off white balance.
Learn how to frame the images and create a continuous flow through them.
- No Catchlights in the Subject’s Eyes
It is an unflattering portrait when the subject’s eyes appear black, sunken holes rather than sparkling and bright. This means that there are no catchlights in the subject’s eyes. The light does not come in contact with the subject’s face.
Directing the light onto the subject’s eyes is a challenging thing to do in indoor photography. To do it, use a reflector or artificial light to add light to the subject.
Alternatively, you can ask your subject to turn towards the light source. These are effective techniques to put emphasis on the subject’s eyes.
Ready to crush it as a photographer this year?
SLR Lounge Premium is a treasure chest for photographers of all levels and is our #1 recommended platform. Read the review now.
How to Avoid Shadows in Photography: Thoughts
Indoor photography can be quite challenging because of the different light sources that come into play.
Many wonder how to eliminate shadows in portrait photography. You have to understand your camera’s limitations and maximize its capabilities to compensate the light sources and avoid the shadows that can ruin the shot.
However, we get into moments when we don’t have the time to adjust the camera settings and compensate for the lighting. These are what we call the Kodak moments—they come in an instant and once gone, you couldn’t bring them back.
When taking these precious moments, what you need is to set your camera to auto mode and put your faith on it and on the available lighting.
Now…
I’d like to hear from YOU:
- What are the indoor flash photography camera settings?
- What do you think are best camera settings for indoor photography (no flash)?
- What are YOUR tips on how to avoid shadows when taking pictures?
Let us know in the comments!
About Author
Zarina
Founder & content creator at Digital World Beauty. My main objective here is to create a valuable resource for photography enthusiasts with honest tech reviews, course recommendations, and how-to tutorials.