Please note: As an Amazon Associate I earn from qualifying purchases. I also work with other affiliate partners and may be compensated from the links below. Details here.
Live View in DSLR Cameras: When and How to Use This Mode for Sharper Shots (Guide)

This guide will cover the following questions:
- What is Live View mode in DSLR cameras?
- What are the advantages and disadvantages of this camera feature?
- When and how to use it for sharper, better-focusing shots?
To start off:
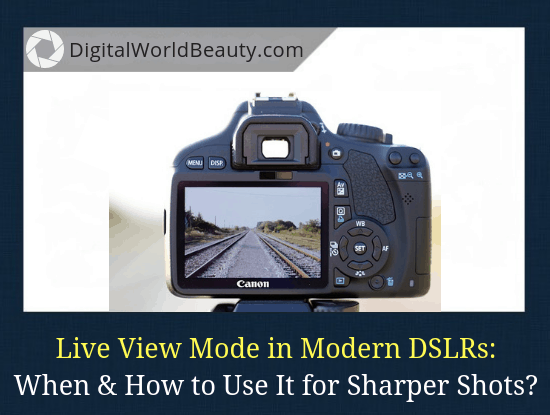
Most modern digital cameras have the Live View function, which allows you to use the camera’s display as a viewfinder.
Technically speaking, the image from the photosensitive sensor is processed in real time and transmitted to the LCD screen located on the back of the camera.
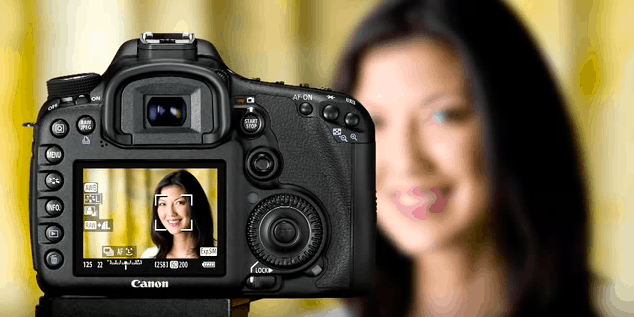
Thanks to the Live View function, the photographer can monitor the subject in real time on his digital camera’s LCD, without looking at the viewfinder.
Without a doubt:
This mode is very convenient when shooting.
Especially when photographing at a high or low angle, and also when it is difficult for an optical viewfinder to be used for whatever reasons.
Truth is:
A lot of photographers rely on Live View DSLR cameras for landscapes (for better focus and sharper images).
Now…
Some beginner photographers will likely think that there is nothing really to say about this feature, but, any owner of a modern DSLR should know about the advantages, disadvantages and other aspects of using the Live View mode.
Live View Mode in Digital Cameras (A Bit of History)

A few years ago, only compact cameras were able to track the object being shot on the built-in LCD monitor.
For DSLRs, this option seemed to be simply useless, since they were equipped with an optical viewfinder.
However, in 2005, a Canon EOS 20Da camera was developed, designed for astrophotography and equipped with the Live View function.
A year later, the first mass-produced DSLR was introduced, also equipped with a preview function on the LCD screen.
It was Olympus E-330.
Since 2008, many SLR digital cameras happened to have the Live View mode. Again, this provided the possibility of using the LCD screen as a viewfinder to view the shot scene in real time.
Today, this mode is used in almost all digital cameras, ranging from simple compacts for everyday shooting to professional SLR cameras.
To be completely fair, not all DSLRs have this function, though those are definitely a minority.
So…
What happens is that in the Live View mode the mirror rises and the image from the lens is projected directly onto the photosensitive sensor of the camera, then it is processed and displayed on the LCD screen in real time (with a slight delay).
In this case, the SLR works on the same principle as the usual point and shoot camera.
Now:
What are the advantages of using LiveView mode for a photographer?
7 Advantages to Using the Live View Mode
There are a few advantages to using the Live View mode, namely:
1) Usually SLRs don’t provide a 100% coverage of the frame in the viewfinder, which means that the final frame after the shutter release will be at least a little, but different from what the photographer sees in the viewfinder.
- Live View mode allows you to have the final image exactly as it is seen on the screen.
2) You can display a grid in Live View mode, an excellent auxiliary tool, which helps to correct the framing of the photo.
3) LV mode allows you to operate with all camera settings in real time, while tracking on the screen how the final frame changes when you set one or another exposure (or other settings).
- Nothing SLR camera with an optical viewfinder can offer that.
4) With the Live View function, it’s easy to change the exposure and saturation settings, thanks to which you can foresee how your final photo will look like.
- During the shooting, additional functions and settings can be displayed on the LCD screen, which is very convenient.
5) Of course, the big advantage of viewing on the LCD display is the fact that it allows you to aim the camera lens on the object from almost any position.
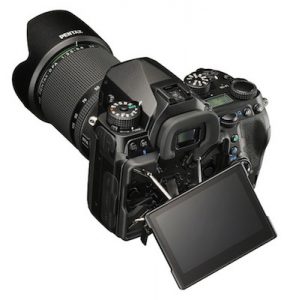
- Especially if the camera is equipped with a fully articulated screen like Pentax K-1, for example.
- You can shoot on arms outstretched high above your head, or, conversely, from a low point at a certain angle, when it is extremely inconvenient to bend and look at the viewfinder. Instead, you use the LCD screen and it’s very helpful.
6) The Live View mode is also very handy with manual focus lenses (when you can focus as accurately as possible). In addition, when focusing, you can zoom in the image when previewing it on the screen.
7) The LV function helps when shooting in difficult lighting conditions because in this mode it’s more convenient and faster to adjust the exposure or white balance.
- This allows you to get a good photo from the first time.
As you can see, there are a lot of advantages to using a Live View mode. No wonder why so many SLR cameras have it built-in, despite the availability of high-quality optical viewfinders.
However, this mode is not without its flaws.
The Disadvantages of Using the Live View Mode
So…
Let’s discuss the disadvantages of using the Live View mode.
Here are a few:
1) Not all digital cameras have a high quality of image detail on their LCD displays because it depends on the resolution and the technology used.
2) Not all displays are protected by an effective anti-reflective coating (filter), so when there’s a direct sunlight on the screen it becomes difficult to discern the image.
- Whereas the optical viewfinder is protected with this coating entirely.
3) The use of the Live View mode results in the sensor overheating, which increases the noise level of the image.
- Though, to be fair enough, in modern digital cameras with an LCD screen, this drawback is practically reduced to a minimum.
4) Autofocus in Live View mode is rather slow, and in this case it’s impossible to use fast phase autofocus. (In the majority of cameras, the LV mode the contrast detection autofocus is used, which is slower than phase detection autofocus.)
5) It’s also worth noting that in this mode, the camera battery dies faster.
- After all, in its normal mode, the camera sensor consumes energy only during the image capture, whereas in Live View mode, the sensor and all built-in electronics work constantly.
Now, let’s figure out when is it useful to use the Live View mode?
When is it Useful to Use the Live View Mode?

If you own a digital SLR camera, there are 2 ways that you can shoot with:
- using the optical viewfinder, or,
- by viewing through the LCD screen in Live View mode.
Perhaps, it’s not smart to use the LV mode on a constant basis, especially as, as I have already explained, this leads to increased power consumption of the camera.
But quite often during the shooting, there are situations when a photographer needs to use Live Mode.
These are the situations when LV is useful:
1) When the of the viewfinder is difficult.
- Such a situation can arise when shooting from uncomfortable positions. For example, if you place your DSLR right on the ground, then obviously it’d be challenging to use the viewfinder.
2) When shooting still life and objects.
- In this case, it is much easier to evaluate the composition and make adjustments.
3) When there’s insufficient amount of lighting.
- In such situations, the operation of the autofocus system tends to fail.
4) When you use manual focus lenses.
As a rule, they are old camera lenses intended for film cameras. Many of these are of excellent quality and have an interesting bokeh pattern.
(Bokeh is that background blur which is especially great for portraits, by the way).
Virtually all professional photographers working in the industry of product photography for advertising, especially jewelry, use manual focus lenses.
However, the problem is that it’s very difficult to focus manually through the viewfinder, even if the camera has an autofocus confirmation chip (also called a dandelion chip).
The slightest turn of the ring by a fraction of a millimeter can lead to leaving the depth of field (DOF). In this case, it’s better to use the Live View mode instead.
Live View Mode and Autofocus:
How to Use It for Sharper, Better-Focusing Shots
As it has already been mentioned, in the LV mode, the autofocus is slower.
(Moreover, the camera may simply not focus when, for example, it is a non-contrast object.)
Autofocus can often fail due to the subject being illuminated by a point light source of varying brightness, or if it’is in motion.
Note: According to this source, here is the definition of “point light source” in terms of photography:
(1) In photographic studio: small light source without reflectors or light shapers, used throw sharp shadows, also to place in confined spaces.
(2) In dark-room: lamp with very small filament and no diffuser used to provide a high-contrast source for enlarging.
Anyway, to ensure accurate focusing in LV mode, follow the steps below:
Step 1: We install the camera on a tripod. It’s necessary so that shaky hands don’t interfere with focusing.
Step 2: Open the lens aperture to the max.
Always focus with an open aperture. This way, you’ll have accurate, sharp photos. Besides, with a minimum depth of field you can assess where the sharpest parts of the object are most important.
Turn on the Live View mode.
Step 3: We make a rough focusing on the sharpness by rotating the focus ring of the lens.
Step 4: We then precisely focus on the sharpness. To do this, use the zoom button to increase the size of the image on the screen by 10 times.
With such an increase in focusing, the sharpness will be absolutely accurate. When you’re done focusing, turn off the Live View mode to prevent the sensor from overheating.
Step 5: Take a photo. Now, at this point everything depends on what kind of lighting you are working with and what kind of exposure you use.
If it’s a studio light and a fast shutter speed (or short exposure time), you can press the shutter button directly.
If a slow shutter speed (or long exposure time) is used and the image is taken in low light conditions, then pressing the shutter button directly can cause the image to blur.
In this case, use the shutter release timer function or the remote control (optional).
And you have yourself a photo!
Check out the video below for further understanding:
This instructional video was to explore the Live View feature using Canon EOS 7D.
Live View in DSLR Cameras: Final Thoughts
Just a few years ago, many professionals and enthusiast photographers were genuinely proud of being owners of SLR cameras without Live View mode.
Basically, shooting in this mode reminded them of amateur photographers with their basic point-and-shoot cameras.
However…
Since then the LiveView function has significantly evolved and even professional photographers gladly use it in challenging shooting conditions.
It should be noted that even though the Live View mode is not a mandatory requirement when choosing a digital SLR camera, the presence of it is definitely preferable.
Especially since this mode is included as an additional function.
Viewing through the LCD screen isn’t constant, but can be used by the photographer only in those moments of shooting, when this is necessary and dictated by a specific situation.
What are your thoughts about Live View in DSLR cameras?
Let us know in the comments!
