Please note: As an Amazon Associate I earn from qualifying purchases. I also work with other affiliate partners and may be compensated from the links below. Details here.
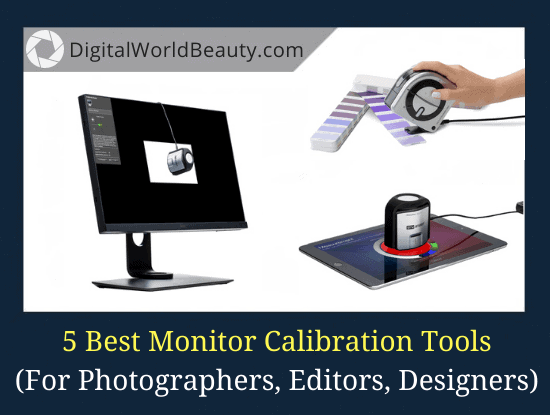
5 Best Monitor Calibration Tools 2022 (For Photographers, Designers, and Editors)

My list of the best monitor calibrators for photographers (2022 update).
Tell you what:
As photographers, you will most likely spend half of your time reviewing and editing your photos, and this is a reality we can’t deny. In fact, this tedious post processing activity is very crucial in achieving your desired results.
What I’m saying is that it is equally important to dedicate time for post as much as you spend time composing the shots.
Today, you will learn:
- about various monitor calibrators;
- how they work; and
- why you need it
Here is a quick summary of the recommended products:
Best Monitor Calibration Tools 2022
- X-Rite i1Display Pro Plus – The best overall choice (editor’s top pick).
- Datacolor SpyderX Elite – A runner up pick. Great calibration tool under $250.
- Wacom Color Manager – Mid range calibrator with user friendly interface.
- Datacolor SpyderX Pro – The best budget monitor color calibrator today.
- X-Rite i1 Studio Spectrophotometer – Premium tool for professionals in 2022.
If you have tried, or have been editing your own photos for a while, you probably realize how important it is to adjust colors and tones. But sometimes, hardware limitations can make this task difficult. On the PC your photos may look vibrant, but when you print or upload it, you get a different result.
To help minimize having these problems, I’ve listed down the best monitor calibration tools this year for photographers, filmmakers, designers, and/or editors.
Also, you can check out the following articles if you’re currently looking for either a great budget laptop or monitor for photo editing.
Let’s get started, shall we?
Best Overall Choice (Editor’s Top Pick)
X-Rite i1Display Pro Plus
- Brand: X-rite
- Year released: 2019
- Price: Under $300
- Recommended: Yes
- Where to buy: Amazon, BH Photo Video, Adorama
This product comes from a brand that is popular for various color management tools. It is a significantly newer model that promises a variety of features not found in its predecessor which is the i1 Display pro. It is currently considered as top of the line for this series.
Here are some of the features you might want to check out:
- Can calibrate ultra bright screens
Most of today’s screens are already in HDR and these are exceptionally bright compared to regular ones. Because of that, the usual calibrators may not be able to fully satisfy your needs. But with i1 Display Pro Plus, that’s no longer a problem.
Its colorimeter can measure up to as much as 2000 nits luminance. This exceeds most of the available tools today which can only handle 1000 nits at maximum capacity. This only means you will be able to measure and adjust color values of displays that are extremely bright, or even those with full HD and HDR features.
- Organic filters (glass)
Another impressive thing about this top notch product is that it has glass filters that are organic. This type of material lasts longer than others, extending the overall life and quality of the colorimiter.
Aside from adding to the hardware’s durability, having these organic filters also help with the overall ergonomics of the product. So, you can expect it to be very user-friendly, even if it is your first time using the product, or any calibration device.
- Flare Correct
Flare is a really annoying problem for most displays. They pertain to the reflections seen on your computer when hit directly by a source of light. While we cannot totally eliminate light because of this reason, you can do something about the amount of flare you are getting.
Display Pro Plus has Flare Correct technology that determines and adjusts the amount of reflection you see on your screen. This way, you can start working with ease and comfort.
- USB-C Compatible
Display Pro Plus does not only calibrate huge displays like TVs and computers, but it can also be used on smaller devices like phones and tablets. That’s why it allows for USB type C compatibility. The pack comes with an adaptor that transforms USB-C ports to USB-A so that you can use the hardware.
- Available in multiple languages
The greatest thing about this product is that it supports various languages (not limited to English). Because of this feature, a lot of artists and professionals will be able to use it with ease regardless of nationality.
✓ What you might like about it:
- Measures up to 2000 nits
- Organic filters
- USB-C compatible
✕ What you might not like about it:
- pricey
Where to buy online? Check price and availability at:
Great Calibration Tool Under $250 (Runner Up)
Datacolor SpyderX Elite
- Brand: Datacolor
- Year released: 2019
- Price: under $250
- Recommended: Yes
- Where to buy: Amazon, BH Photo Video, Adorama
Datacolor is another big name when it comes to color management tools. Just like the previous brand, this particular product line has a lot of different models under the series. Elite, is one of the most popular among them for a variety of good reasons.
Let’s check the features below to know why it is so in demand right now:
- Fast and easy
Datacolor has stated in their site that this series now enables you to precisely calibrate your equipment in a much faster way with the Elite model. It only takes about a minute or two to complete the entire process. And it’s easier compared to other products of the same function.
A lot of people actually love this item because it comes with an assistant that will walk you through the entire process. With its guidance, you will never go wrong with using this advance technology even if it is your first time having it.
- Lens-based color adjustment technology
This awesome features allows for a more precise and accurate measurement of chromatic values. It also lets you match different displays with the same color settings, making it easier for you to switch between screens without compromising the quality of your work.
- Before and After comparison
It’s always nice to be able to compare the enhancements made on your equipment. This feature makes it possible to see how much change was done in order to visually correct the color presentation in you screen.
- Expert Console
If you want to manually do the calibrating through the software, this feature allows you to do that. You can take total control of the entire process and follow your own set of standards. There is no limit as to what you can achieve with the Expert Console feature.
✓ What you might like about it:
- Works faster than other products
- Great ergonomics
- Expert console
- Constantly updated software
✕ What you might not like about it:
- Doesn’t have Bluetooth
- Very similar functions with predecessors
Where to buy online? Check price and availability at:
User Friendly Colorimeter Under $250
Wacom Color Manager
- Brand: Wacom
- Year released: 2015
- Price: Under $250
- Recommended: Yes
- Where to buy: Amazon, BH Photo Video, Adorama
Today, many display manufacturers have set different color standards for their products. While this has some benefits to it, this also makes it harder for artists to let the clients (especially those who view the portfolio online) see their work as it is.
Wacom wants help out artists by developing this product to ensure that all your works are viewed the same way across all your viewing devices.
Here are its features:
- 2 functional modes
The software is available in 2 modes, basic and advanced. Depending on your preference, you can have the chance for full control of the process from start to finish.
As for the Basic Mode, the software basically does the calculation for you. This means you don’t need to have any knowledge or experience in color adjustments and calibration. If you choose this mode, you’ll solely rely on the software’s ability to detect and measure chromatic values and set everything else for you. This is the easiest part which is very beginner friendly.
For those who are experienced in this department, you may opt to go for the Advanced mode. Here, you will be the one to do the hard work. But this also means you get 100% control over the settings and can even set your own standards.
- Sharing between workgroup
This allows for sharing the same profiles in a workgroup. This will make your workflow more efficient since you don’t have to do it for every other display you might be using.
- Compatible to most X-Rite mobile app
Fun fact: Wacom collaborated with X-rite in creating this product.
Since the major brand participated in the creation of this gadget, it is not surprising that it is compatible to most of their software. This is really good news for those who also want to readjust their mobile and tablet’s color values.
This is also really beneficial since a lot of artists now work “on-the-go”. Meaning they prefer to use handy and mobile devices so that they are more efficient.
✓ What you might like about it:
- Shared profiling
- Mobile app compatible
- Before and after comparison
✕ What you might not like about it:
- might not work on Linux-run devices
Where to buy online? Check price and availability at:
Best Budget Display Color Calibrator in 2021
Datacolor SpyderX Pro
- Brand: Datacolor
- Year released: 2019
- Price: Under $200
- Recommended: Yes
- Where to buy: Amazon, BH Photo Video, Adorama
Being known as color experts, Datacolor lives up to the expectations of consumers by releasing another SpyderX product. This model was launched together with Elite, giving you an option to choose from. Price-wise, this is cheaper than Elite. But of course with that price drop, some feature trade-offs are expected.
Let’s check out its features:
- Compact hardware
One of the reasons why this brand has been popular ever since is that they have neat and really compact hardware. It has a really good ergonomic feel that and you can see that the materials used are high quality.
- Lens-based
A lot of people have been comparing this model to SpyderX 5, which is another series in the brand’s product line. At first glance you might not notice the hardware difference, but when you inspect the insides, you will know why. Pro model now comes with lens, which replaced the grill-like detector of the predecessor. This allows for better and accurate color measurements, making the entire system more reliable than ever.
- Guided calibration
This is a perfect feature who doesn’t know how to do this process. With a single click, you will be able to adjust your display’s colors. You can just wait for it to finish and continue doing your awesome work afterwards.
- Ambient reader
This is probably the best part about this equipment. With the hardware placed on top of your computer, it automatically reads the environment for any lighting change and adjusts colors automatically.
✓ What you might like about it:
- Ambient reader
- Ergonomic
- High quality materials
- Easy to use software
✕ What you might not like about it:
- performance in low light can use some improvements
Where to buy online? Check price and availability at:
Premium All-in-One Spectrophotometer 2021
X-Rite i1 Studio Spectrophotometer
- Brand: X-rite
- Year released: 2017
- Price: Under $500
- Recommended: Yes
- Where to buy: Amazon, BH Photo Video, Adorama
Now, if you don’t have budget constraints, then this premium product from X-Rite is definitely worth investing in.
It’s one of the few trusted high-end calibration tools this year. Despite being launched in the later parts of 2017, this spectrophotometer still remains to be one of the most preferred models by professional filmmakers, photographers, designers, and editors.
Here are its features that you need to know of:
- B&W Profiling
Photography isn’t only about vivid and colorful images. Sometimes, it is also about black and whites. In fact, this is more commonly used in portraiture to achieve a more dramatic feel, which makes it all the more interesting. And if you think you don’t need to check the chromatic values of your device just because you process b&w photos, then think again.
Black and white images are delicate because it involves shadows and highlights which add to the overall effect. But if your screen isn’t set to a particular standard, then that might cause issues. While editing you might think you already made the right adjustments so it shows the perfect contrast, but when you send it over the client, they receive something of less quality. So, this new profiling feature is to your advantage.
- Software compatibility
Another good news to avid fans of X-Rite products is that its software is compatible to a variety of platforms or operating systems. You can have devices run on Windows and MacOS and still be able to use the same software for both. This is great for those who use several equipment running on various OS. You no longer need to buy a separate tool for other screens. This one is definitely an all-arounder.
- Mobile App
It is also amazing to know that X-Rite has a very functional and user friendly mobile app. This helps you adjust and correct color settings for smaller gadgets like smartphones and tablets. In fact, this even works on some cameras.
- Printer/Scanner Profiling
One of the reasons why this product is so popular is that it doesn’t only correct your display, but also makes sure that printing quality matches to that of the actual image that you see in digital form. This only means that from capture to print, you will have uniform image quality, adding credibility and excellence to your work.
✓ What you might like about it:
- Available for a lot of equipment
- Different profiling capabilities
- Compatible for mobile devices
✕ What you might not like about it:
- Expensive high end product
Where to buy online? Check price and availability at:
Why Do You Need to Calibrate Your Equipment?
For a variety of reasons, not a lot of people know the real significance of having well calibrated monitors. For non-photographers/non-designers/non-editors, sticking to the default color rendition of your screens may be enough to carry on your usual activities.
But for professionals, this is very important.
In fact, color quality means so much for these people with artistic line of work. If you do editing without paying attention to the chromatic values it produces, then you are going to be very surprised at how different your work will appear in another screen.
So, here are the reasons why it is important to invest in spectrophotometers/colorimeters if you still haven’t:
- To correct color rendition
There’s nothing more satisfying than seeing a picture on screen with almost the same colors and tones it has in real life. Most of the time, we take photos of scenes that catches our eyes, and most of these are often the vibrant style.
Now, imagine being all too excited to capture the moment and when you finally review it on a larger display, you are left with nothing but a dull and seemingly boring image. That would just end up really frustrating, right?
So, screen calibrators are there to help you avoid having that issue. With this tool, you will most likely see what you captured as it is, no camera tricks, as they say.
- To minimize differences in output between various displays and prints
Have you ever tried using several screens for your work? If you have, then chances are you’ve experienced slight to significant difference between the visual display output.
Well, that’s somewhat expected especially if you are using dual monitors from different manufacturers. Truth is, different brands calibrate their screens differently. Standards and defaults of one brand may not be exactly the same as that of the other brand.
But if you have your very own calibrator, this will not be a problem anymore. You can simply adjust it so that it comes up with the same color values on both ends.
- To provide you with more accurate chromatic values for better workflow
Editing photos takes so much time, especially if you’re still learning the ropes. However, time is not an unlimited resource. In fact, when you are into editing, it is as if time is always short on supply. This is because there are a lot of things you need to do, much more if your equipment isn’t properly calibrated.
You know what happens when you don’t properly calibrate your screen before editing?
You spend more time adjusting colors and tones especially for RAW files. Your monitors may give you false color values, tricking your eye to see less contrasted (more for some) images. Thus, you spend more time altering that aspect of the photo. And when you do print those, you might see overly saturated images instead of the one you tried achieving in post.
Whereas if you use monitor calibrators, you will most likely end up using less editing time. That’s because newer DSLRs and mirrorless have better color rendition properties already. So, you get to take photos that have better tonal qualities. This means less time and effort retouching the images.
How Do Color Calibration Tools Work?

Calibrating your screens to ensure better accuracy for color rendition is quite simple. You just need to have the proper equipment and follow some easy steps to begin.
Here is the step-by-step guide (regardless of which tool you choose):
- Prepare your monitor/s
It is important to prep your equipment before actually doing the calibration if you want to get more accurate results. You have to keep in mind that one device may not offer the same results on the same screen under certain conditions. To minimize that effect, you need to properly prepare your monitors at least 15 to 30 minutes.
Place your PC/device in a spot where it won’t get hit by direct light (regardless if it is natural or artificial one). Otherwise, it will affect the results of your calibration.
Also, it would be best to have your monitor warmed up a little bit. Max of 30 minutes is enough to make this truly effective. This provides for more accurate results later.
- Install the software
There is a software that comes with your calibration tool. Follow the instruction from the manufacturer on how to do this. Make sure that you properly and successfully install the software before proceeding. If there are issues about the software, I advise you contact the creator immediately to have it solved.
After installation, try to open the software and run it. There are some easy to use ones, while others are a bit too complicated. If you are not sure how to navigate through it, you can search for video tutorials online (mostly you can find one from official websites of the manufacturer).
By the way, this should always be paired with its calibrator. You can’t mix and match software and hardware when it comes to this part.
- Connect hardware to PC and start calibrating
As mentioned earlier, the pack should come in pair. Once you are done with the installation, connect the colorimeter to the monitor. Just wait for the software to prompt you to place the device in front of your equipment that needs adjustment.
This is the one that detects the color values that your screen releases every time you use it. Through it, the software analyzes the data and then removes/alters the color settings to conform with standards. It will save that template and use it every time you restart your PC.
Now, I’d like to hear from YOU:
What are your thoughts on this list of the top rated monitor calibration tools for photographers, filmmakers, designers and editors in 2021?


